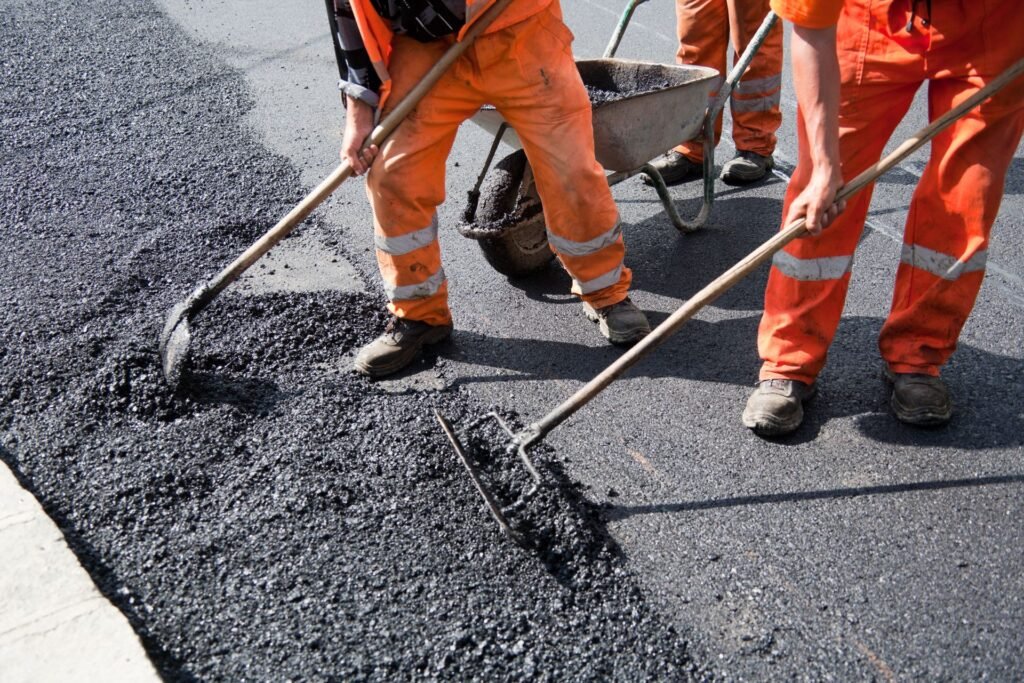

Welcome to your ultimate guide on how to get paint off concrete in NZ, where we’ll walk you through practical, effective methods to safely remove unwanted paint from your driveways, patios, and other concrete surfaces. Whether you’ve dealt with accidental spills during a home project or you’re looking to freshen up old, worn-out paint, we understand that removing paint from concrete can be a tricky task, especially given the porous nature of concrete and New Zealand’s varying weather conditions. In this blog, we’ll explore eco-friendly options, DIY techniques, and tips for using locally available products, ensuring you have everything you need to restore your concrete to its original state with minimal fuss.
To remove paint from concrete in NZ, begin by scrubbing the area with a wire brush and soapy water for small spills. For larger or more stubborn paint stains, use a power washer or apply a concrete-safe paint stripper. Eco-friendly options are available in NZ, and for extensive areas, consider hiring a professional or using sandblasting for more effective results. Always wear protective gear and test a small area before starting.
Table of Contents
Why Removing Paint From Concrete Is Difficult
Concrete is one of the most durable and widely used building materials, especially in outdoor spaces like driveways, patios, and steps. However, if you’ve ever tried removing paint from concrete, you know how tough it can be. Here’s why the process is so challenging and what makes concrete unique.
The Nature of Concrete
Concrete might look solid and impenetrable, but it’s actually a very porous material. Think of concrete like a sponge with tiny holes and pores on its surface. When paint is applied whether intentionally or accidentally it doesn’t just sit on top of the surface. Instead, the paint seeps into these pores, making it extremely difficult to remove entirely. Over time, as the paint penetrates deeper, it bonds more tightly with the concrete, complicating the removal process even further.
Common Scenarios Where Paint Removal is Necessary
There are many situations where paint removal from concrete becomes necessary.
- Overspray or Paint Spills: If you’ve been painting your house or fence, overspray or accidental spills can land on your concrete surfaces. These can be tricky to deal with, especially if the paint has been allowed to dry and soak into the porous concrete.
- Old Paint on Patios or Driveways: Concrete patios, driveways, and garage floors often have old layers of paint that may have chipped or worn down over time. Whether you’re dealing with flaking paint or want to refresh the surface, removing these old layers can be a tedious task.
- DIY Projects Gone Wrong: Many people try painting their concrete floors or outdoor spaces only to decide later they want to go back to the natural look. Undoing these DIY efforts can be much harder than it was to apply the paint in the first place.
Concrete in New Zealand
In New Zealand, concrete is a popular choice for outdoor spaces due to its durability and ability to withstand various weather conditions. Whether it’s driveways, patios, or outdoor steps, you’ll find concrete widely used in Kiwi homes. However, the type of concrete used in NZ might vary slightly based on the region, and different environmental factors like the moisture levels and climate can affect how paint adheres to concrete surfaces. For example, outdoor spaces exposed to high levels of rain or humidity may see paint penetrating deeper into the concrete pores, making it even harder to remove.
Key Takeaways
- Concrete’s porous nature: makes it a challenge to fully remove paint once it has been absorbed.
- Paint overspray, spills, and old layers: of paint are common reasons for needing to strip paint from concrete.
- In New Zealand: the climate and type of concrete used in outdoor spaces can add to the difficulty of paint removal.
Removing paint from concrete is never a straightforward task, and the best approach often involves a combination of methods like chemical paint removers, pressure washing, or even sanding. The porous nature of the material is what makes the job especially difficult, but with the right tools and techniques, it’s possible to restore your concrete surfaces to their original condition.

Precautions Before You Begin Any Painting Project
Protective Gear
When you’re about to dive into a painting project, whether it’s stripping old paint or applying a fresh coat, safety should be your top priority. Wearing the right protective gear is a must to safeguard yourself from potential hazards, especially when working with chemical-based products like paint removers or certain types of paint.
- Gloves: Protect your hands from chemical burns, irritation, or allergic reactions. Some paint removers and paints can be harsh on the skin, and prolonged exposure may lead to discomfort or even injury. Nitrile gloves are often a great choice as they offer chemical resistance without sacrificing dexterity.
- Safety Goggles: Your eyes are incredibly vulnerable to splashes or particles during a painting project. A good pair of safety goggles will shield your eyes from harmful substances that may cause irritation or more severe damage. Even a small drop of paint remover or paint in the eye can be dangerous, so don’t skip this crucial step.
- Mask or Respirator: When using products that emit fumes or dust, like paint removers, primers, or spray paints, a mask or respirator is essential. These fumes can be harmful to your lungs and respiratory system, causing dizziness, nausea, or long-term health issues. Look for a mask that is rated for chemical fumes or dust depending on the product you are using.
By equipping yourself with the right protective gear, you’ll reduce the risk of injury and ensure a safer, more comfortable work environment.
Testing a Small Area
Before jumping headfirst into any project, it’s crucial to test the product you’re using on a small, inconspicuous area. Whether you’re stripping old paint or applying a new color, this simple step can save you from potential disasters.
- Why Test First: Not all surfaces react the same way to paint or paint remover products. Testing in a hidden spot allows you to see how the surface will react before committing to the entire project. If the product causes discoloration, damage, or doesn’t achieve the desired effect, you’ll know before it’s too late to reverse the damage.
- What to Look For: When testing, check for adverse reactions like bubbling, cracking, or uneven texture. For paint applications, make sure the color dries to your liking and that the surface absorbs the paint correctly. This step is especially important when working on surfaces like wood, brick, or specialty finishes.
By taking the time to test a small area first, you can avoid potential headaches and ensure a smoother process from start to finish.
Environmental Concerns
In today’s world, being mindful of the environment is more important than ever, and New Zealand has strong environmental policies to protect its natural beauty. When embarking on a painting project, there are several ways you can minimize your impact on the environment while still achieving professional results.
- Proper Disposal of Paint and Paint Removers: Paint and chemical-based products can be harmful to the environment if not disposed of correctly. Never pour leftover paint, thinners, or removers down the drain, as they can contaminate water sources. Instead, take any unused products to your local hazardous waste disposal facility. Many communities have designated drop-off points where you can safely dispose of chemicals.
- Eco-Friendly Alternatives: Today, many paint companies offer eco-friendly paints and removers. These products are often water-based and contain fewer volatile organic compounds (VOCs), which can harm both the environment and your health. Look for paints labeled as “low-VOC” or “zero-VOC” to reduce air pollution and improve indoor air quality. Similarly, opt for paint strippers that use biodegradable ingredients, which are safer for both you and the environment.
- Supporting NZ’s Environmental Policies: New Zealand is known for its strict environmental protection measures. When selecting your products, consider supporting local brands that prioritize sustainability and adhere to the country’s environmental guidelines. This way, you’ll not only protect the environment but also contribute to the growing demand for greener products.
By being conscious of your product choices and waste disposal, you can complete your painting project in a way that aligns with New Zealand’s environmental values, ensuring that you’re doing your part to protect the planet.
Prioritizing safety, testing your products, and considering the environment are all essential steps to a successful painting project. Whether you’re a DIY enthusiast or a professional, following these precautions ensures that you not only protect yourself but also contribute to a more sustainable future. With the right protective gear, smart testing, and eco-conscious choices, you can enjoy a smooth, safe, and environmentally friendly painting experience.

Scrubbing With A Wire Brush And Soap
If you’re looking for an effective, eco-friendly way to remove paint from concrete surfaces, scrubbing with a wire brush and soap is a simple yet efficient method. Whether you’re dealing with paint splatters on your driveway or a thin layer of paint in an outdoor space, this approach is both affordable and easy to execute. Here’s a step-by-step guide to help you get started.
Materials You’ll Need
- A sturdy wire brush
- Warm water
- Soap or a mild detergent
Step-by-Step Instructions
- Prepare the Area: Begin by soaking the paint-stained area with warm, soapy water. The soap helps to loosen the paint, making it easier to remove.
- Scrub the Paint: Using a wire brush, start scrubbing the concrete surface. It’s important to focus on small sections at a time to get the best results. Work the bristles of the brush into the surface to break up the paint. Depending on the thickness of the paint, you may need to scrub for several minutes.
- Repeat as Needed:If the paint doesn’t come off in one go, don’t be discouraged. Repeat the process, especially if the paint is embedded in rough or porous concrete. Persistence is key.
How Effective is this Method
This scrubbing technique works best for smaller areas where the paint layer is thin or when you are dealing with paint splatters rather than large-scale spills. It may not be ideal for thick, stubborn layers of paint, but it’s perfect for touch-ups or smaller cleanup jobs.
Key Advantages
- Eco-Friendly: There are no harsh chemicals involved, making this method safe for the environment and perfect for outdoor spaces like driveways or patios.
- Inexpensive: All you need is a wire brush, some soap, and water, making it one of the most budget-friendly paint removal methods.
NZ Context: Why This Method is Great for Outdoor Areas
In New Zealand, many people are concerned about the impact of chemicals on their natural environment. This method is ideal for those looking to clean up outdoor areas such as driveways or patios without introducing harmful chemicals into the soil or waterways. It’s a simple, eco-conscious solution that fits well with the Kiwi ethos of sustainability.
Scrubbing with a wire brush and soap is an effective, environmentally safe option for removing small patches of paint from concrete. It’s perfect for those who prefer a chemical-free approach and works especially well in outdoor spaces where you might want to avoid harsh cleaners. Give it a try the next time you need to tackle paint on your concrete surfaces.

Power Washing
Power washing is an efficient way to remove paint from large outdoor surfaces like driveways, patios, or walls. This method is especially useful when dealing with vast areas, offering both speed and effectiveness. Below is a step-by-step guide to help you tackle this job with ease, along with some important tips and cautions to ensure you get the best results.
Materials Needed
- Power Washer: You can rent or purchase a power washer, with most local hardware stores in New Zealand, such as Bunnings or Mitre 10, offering rental services.
Step-by-Step Instructions
- Set the Power Washer to Medium-High Setting: Start by setting your power washer to a medium-high setting. This level will provide enough pressure to remove paint without causing excessive damage to the surface.
- Direct the Spray at a Slight Angle: When spraying the painted area, hold the nozzle at a slight angle rather than directly on top of the surface. This helps lift the paint without pushing it further into the material.
- Move Slowly Across the Surface: Slowly guide the spray across the painted surface, ensuring you cover every section evenly. This steady pace prevents streaks or missed spots, giving you a uniform finish.
Effectiveness
Power washing works best on large, outdoor surfaces. It’s highly effective for areas like driveways, patios, or exterior walls where other methods may take too much time or effort. If you’re working with significant surface areas, power washing is the way to go.
Tips
- If you don’t own a power washer, consider renting one from local stores. In New Zealand, Bunnings or Mitre 10 are great places to find affordable rental options.
- Always check the condition of the surface you’re washing. If the area is particularly old or delicate, you may want to opt for a gentler setting or consult with a professional.
Caution
While power washing is effective, it’s important to note that it can cause damage to certain surfaces, especially older or more fragile concrete. The high pressure can erode the top layer of concrete, so if you’re unsure about the condition of your surface, test a small area first. If you notice any damage, reduce the pressure or consider using a different removal method. By following these steps and precautions, you can efficiently remove paint from outdoor surfaces without compromising the integrity of the material underneath.

Removing Paint With Paint Strippers
When dealing with stubborn or thick layers of paint, paint strippers are often the most effective solution. This method works well on large surfaces, especially indoors where precision is key. In New Zealand, a variety of paint strippers are available, ranging from chemical-based options to eco-friendly alternatives. Below, we provide a detailed guide on how to use paint strippers effectively, with recommendations tailored to NZ-specific products.
Types of Paint Strippers
- Chemical-Based Paint Strippers: These are the most common and powerful paint removers, designed to break down multiple layers of paint in one application. While highly effective, they must be used with caution due to the harsh chemicals involved. Brands like Dumond Smart Strip and Norske Power Gel are well-known in New Zealand for their strength and reliability.
- Eco-Friendly/Biodegradable Paint Strippers: For those who prefer a more environmentally friendly approach, eco-friendly paint strippers are available in New Zealand. These products are safer for both the user and the environment, using natural ingredients that minimize harmful emissions. Popular brands include Dumond Smart Strip, known for its non-toxic formula, and Resene products, which offer both chemical and biodegradable options that align with eco-conscious projects.
Step-by-Step Instructions for Using Paint Strippers
To ensure you get the best results, here’s a step-by-step process for using paint strippers effectively.
- Prepare the Area: Ensure the area is well-ventilated, especially if you’re working indoors. If possible, work outside to reduce the risks associated with fumes from chemical-based products.
- Apply the Paint Stripper: Using a paint brush or roller, apply an even layer of the paint stripper to the painted surface. Be sure to cover the entire area you wish to strip. Follow the instructions on the product’s packaging to avoid over-application.
- Allow Time to Set: Paint strippers need time to work. The setting time will vary depending on the product used—most take between 15 to 60 minutes. During this period, the paint stripper breaks down the bond between the paint and the surface, making it easy to remove.
- Scrape Off the Paint: Once the paint stripper has done its job, use a scraper or a wire brush to remove the loosened paint. Be gentle to avoid damaging the surface underneath, especially if you’re working with wood or delicate materials.
- Rinse Thoroughly: After scraping, it’s essential to rinse the surface with water to remove any leftover residue. This ensures that the surface is clean and ready for repainting or further treatment.
Effectiveness of Paint Strippers
Paint strippers are particularly effective for removing thick or multiple layers of paint. They are ideal for large indoor surfaces or projects where heat guns and sanding may not be suitable. Chemical-based strippers are powerful enough to tackle even the most stubborn paints, while biodegradable options provide a safer alternative for eco-friendly homeowners. Both are available across New Zealand, making it easy to choose the product that best fits your needs.
NZ-Specific Recommendations
In New Zealand, several retailers offer both chemical-based and eco-friendly paint strippers. Stores like Bunnings, Mitre 10, and Resene ColorShops stock popular brands like Dumond Smart Strip and Resene paint removal products. Whether you’re looking for something biodegradable or a stronger, more traditional option, these stores have a variety of choices to suit every project.
Safety Tips When Using Paint Strippers
Using paint strippers, especially chemical-based ones, requires attention to safety. Here are some essential safety tips.
- Ensure Proper Ventilation: If working indoors, make sure the area is well-ventilated by opening windows and doors. Using fans can also help circulate air and reduce fume buildup.
- Wear Protective Gear: Always wear gloves, goggles, and a mask to protect yourself from the chemical fumes and accidental contact with the skin or eyes.
- Follow Product Instructions: Each product is different, so it’s crucial to follow the manufacturer’s instructions closely. This includes applying the product safely and adhering to the recommended setting time.
- Dispose of Waste Properly: After finishing your project, make sure to dispose of any leftover paint stripper and remove paint properly. Many products need to be disposed of at a hazardous waste facility.
Paint strippers offer a reliable solution for removing stubborn layers of paint. Whether you opt for a chemical-based product or a biodegradable option, the right stripper will make your project quicker and more efficient. By following the steps and safety tips provided, you can ensure a smooth and successful paint removal process, leaving your surface ready for its next transformation. For New Zealand homeowners, there are many local retailers where these products can be found, making it easy to start your next DIY project with the right tools.

Sandblasting (For Large Areas Or Professionals)
What Is Sandblasting?
Sandblasting is a powerful cleaning technique that involves blasting a surface with high-pressure abrasive materials, often sand, to remove layers of paint, rust, or other coatings. This method uses an air compressor to propel abrasive particles at high speeds, essentially stripping away any unwanted layers on a surface. It’s widely used in industrial settings but can also be applied in residential projects when large or tough surfaces need cleaning or restoration.
The process works by wearing down the material on the surface, leaving it clean, smooth, and ready for repainting or refinishing. Sandblasting is often used on metal, concrete, and even brick, making it a versatile solution for large, rugged surfaces that require a deep clean.
When to Use Sandblasting
Sandblasting is ideal for large outdoor areas or when other paint removal methods, such as sanding or chemical strippers, have failed to achieve the desired results. It’s especially effective on rough, uneven surfaces where precision isn’t as critical, such as concrete walls, metal fences, or brick exteriors.
This method is often best left to professionals because it requires specialized equipment and expertise. Improper use can damage the surface or even create health risks from dust and debris. However, for large-scale jobs where speed and thoroughness are needed, sandblasting is one of the most effective options available.
Cost Considerations
When considering sandblasting, the cost can vary significantly depending on the size of the area, the complexity of the job, and whether you choose to hire a professional or rent the equipment.
In New Zealand, professional sandblasting services generally range from NZD 70 to NZD 120 per hour, depending on the region and the complexity of the work. For large, heavy-duty projects, hiring a professional might be the most cost-effective and safe choice.
If you’re considering doing it yourself, renting sandblasting equipment typically costs between NZD 200 to NZD 400 per day. However, keep in mind that this price may not include the cost of the abrasive materials or safety gear, which are essential for completing the job safely.
Pros and Cons of Sandblasting
Pros
- Highly Effective: Sandblasting is extremely efficient for cleaning large, rough surfaces where other methods may struggle. It can strip off multiple layers of paint or rust in a matter of hours, making it a great choice for projects requiring speed and thoroughness.
- Versatile: This method works on a wide variety of materials, including metal, concrete, and brick, making it suitable for many different types of projects.
- Long-Term Results: Because sandblasting gets down to the bare material, it leaves the surface clean and smooth, providing an excellent foundation for repainting or refinishing.
Cons
- Expensive: Whether you hire a professional or rent the equipment, sandblasting can be costly, especially for larger areas. The cost of safety gear and materials adds up quickly if you’re doing it yourself.
- Messy: Sandblasting creates a lot of dust and debris, which can spread over a large area. This can be a significant clean-up task, especially if the job is done outdoors.
- Requires Expertise: Sandblasting isn’t a DIY-friendly method unless you have prior experience. It can be dangerous if not done correctly, as the high-pressure abrasive can damage surfaces or harm the person operating the equipment.
Sandblasting is a powerful solution for large-scale paint removal projects or heavily corroded surfaces, but it comes with significant cost and expertise requirements. If you’re dealing with a large, tough surface, hiring a professional for sandblasting might be the best option to ensure a smooth and efficient process.

Removing Paint Using A Heat Gun
Removing paint can sometimes be a challenging task, especially when dealing with stubborn or old layers of paint. One of the most effective ways to tackle this problem is by using a heat gun. This method is particularly useful for removing paint from smaller, more targeted areas. Let’s walk through the steps and ensure you have a safe and successful paint removal experience.
Materials Needed
- Heat Gun: A powerful tool that blows hot air to loosen paint.
- Scraper: A handheld tool to help remove the softened paint once it’s heated.
Step-by-Step Instructions
- Prep the Area: Before you start, make sure the area you’re working in is well-ventilated. Remove any flammable items nearby to avoid potential accidents. Place a drop cloth or tarp under your work area to catch any falling paint debris.
- Heat the Paint: Hold the heat gun a few inches away from the surface. Turn it on and direct the heat towards the paint. Move the heat gun slowly and evenly over the surface. The paint will begin to bubble and loosen as it heats up. Be cautious not to overheat the surface, especially if you’re working with wood, as excessive heat could damage it.
- Scrape Away the Paint: Once the paint starts bubbling, gently use the scraper to lift and peel away the loosened paint. Start from the edges and work your way inward. Take your time rushing may cause damage to the underlying surface. Repeat this process in sections until all the paint is removed.
- Clean the Surface: After you’ve removed the paint, use a damp cloth or sandpaper to clean any residue left behind. If the surface is wooden, sanding it lightly will help prepare it for a new coat of paint or finish.
Effectiveness
Using a heat gun is especially effective for removing paint in small, localized areas where precision is important. It’s less messy than using chemical strippers and works faster in most cases. However, it’s not ideal for larger projects, as the process can be time-consuming if you’re working on big surfaces.
Safety Tips
Working with a heat gun requires caution to prevent accidents. Here are a few important safety precautions.
- Wear gloves: Protect your hands from the heat and any sharp edges while scraping.
- Use a mask: Paint fumes, especially from older paints, can be hazardous. Wearing a mask will protect you from inhaling toxic fumes.
- Avoid overheating: Be mindful of how long you apply heat to a surface to avoid burns or damage. If working with wood, excessive heat can scorch or even set the surface on fire.
- Keep a fire extinguisher nearby: Although rare, it’s always better to be prepared in case of any accidents.
Where to Buy a Heat Gun
Heat guns are readily available at most hardware stores in New Zealand. You can find them in popular stores like Bunnings Warehouse, Mitre 10, or online retailers. They come in various sizes and power levels, so choose one that suits your project’s needs.
Using a heat gun is a practical, efficient way to remove paint from small areas. By following the steps outlined above and keeping safety in mind, you’ll be able to get your surfaces paint-free and ready for whatever project comes next.

DIY Vs. Hiring A Professional
When it comes to home improvement, the big question often is: Should you tackle the job yourself or hire a professional? Both options have their pros and cons, and the decision can depend on the scale of the project, your skill level, and the results you’re aiming for. In this guide, we’ll break down when it’s best to roll up your sleeves and DIY, and when it’s worth calling in a professional, particularly for residents in New Zealand.
When DIY Works
There’s a satisfying sense of accomplishment when you handle home improvements on your own, not to mention the potential savings. DIY projects are ideal for smaller jobs or when you already have some experience with tools. Here are a few situations where a DIY approach can be the best option.
- Small Painting Projects: If you’re just touching up walls or painting a small room, doing it yourself can save time and money. Small projects don’t require extensive prep work, and a quick trip to the hardware store for supplies will likely be all you need.
- Light Paint Spills or Stains: Got a small paint spill? Cleaning it up yourself with the right techniques and materials is usually straightforward and doesn’t require a professional cleaner.
- Confident with Power Tools: If you’re comfortable using power tools and have some experience, smaller carpentry tasks, such as building shelves or minor repairs, are within your reach.
DIY can also be an exciting way to learn new skills and take control of how your space looks and feels. However, it’s crucial to understand your limitations, which is where knowing when to call in a pro comes into play.
When to Call a Professional
While DIY can be rewarding, some tasks are better left to the experts. Professional tradespeople bring years of experience and specialized equipment that ensures high-quality results. Here are some scenarios where hiring a professional is the smarter choice.
- Extensive Paint Coverage: Painting large areas, such as an entire home exterior or multiple rooms, can be physically demanding and time-consuming. A professional painter will not only finish the job faster but also ensure a smooth, even finish that may be difficult to achieve on your own. They also know how to handle tricky spots, like high ceilings and intricate trims.
- Delicate or Specialty Surfaces: If your project involves delicate surfaces such as old, ornate plasterwork or decorative wood you’ll need someone with expertise. Professionals know how to work around these surfaces without causing damage, which is often hard to guarantee when you’re doing it yourself.
- Safety and Compliance: For tasks that involve electrical work, plumbing, or anything that might affect the structural integrity of your home, it’s critical to hire a licensed professional. New Zealand has strict building regulations, and DIY mistakes can lead to costly repairs or fines.
Hiring a professional also adds peace of mind. They are insured, experienced, and can often complete projects quicker and with fewer disruptions to your daily life.
Finding a Local Professional in New Zealand
Once you’ve decided it’s time to call in a professional, the next step is finding the right one. Fortunately, New Zealand offers plenty of resources to help you connect with qualified tradespeople. Here are some reliable options:
- Builderscrack.co.nz: This website allows homeowners to post jobs and receive quotes from local professionals. You can read reviews from previous clients and compare prices, making it easier to find someone who fits your budget and needs.
- Yellow Pages (yellow.co.nz): NZ’s Yellow Pages is a long-standing directory where you can find local professionals, from painters and decorators to builders and electricians. With search filters and customer reviews, you can narrow down your options based on location and services offered.
- Word of Mouth: Don’t underestimate the power of local recommendations. Asking friends, family, or neighbors for referrals can lead you to trusted professionals who have already proven their work quality.
Deciding between a DIY project or hiring a professional comes down to the scope of the task, your confidence level, and the desired results. Small, manageable projects are great for DIY enthusiasts, while larger, more complex jobs are best handled by experts. If you’re in New Zealand and ready to hire a pro, websites like Builderscrack and Yellow Pages can help you find the right tradesperson for the job. By weighing your options carefully, you can ensure your home improvement project is successful, stress-free, and done to the highest standard. Whether you go DIY or professional, your home deserves the best.

Eco-Friendly Paint Removal Option
Removing paint doesn’t have to harm the environment. Whether you’re refreshing your home, upcycling furniture, or tackling a renovation project, there are eco-friendly ways to strip paint without damaging New Zealand’s beautiful environment. In this guide, we’ll cover the top methods for eco-friendly paint removal, including non-toxic paint strippers, natural solutions, and sustainable disposal practices. Let’s dive into the details:
Non-Toxic Paint Strippers
One of the best ways to minimize your environmental impact during paint removal is by using non-toxic paint strippers. Traditional chemical-based strippers often contain harmful substances, like methylene chloride and caustic soda, which are hazardous to both human health and the environment. Luckily, there are eco-friendly alternatives available in New Zealand.
These non-toxic paint removers are made from biodegradable ingredients, which break down naturally without contaminating soil or waterways. Some NZ-friendly products to consider include.
- EcoFast Gel Paint Stripper: Known for its plant-based formula, EcoFast is a gentle yet effective option that’s safer for you and the planet.
- Citrus-based Paint Removers: Derived from citrus oils, these products not only cut through layers of paint but also leave a fresh scent behind. They’re biodegradable and non-toxic, making them a popular choice among environmentally conscious DIYers.
- Soy Gel Strippers: These utilize soy oil to dissolve paint, offering a non-caustic and non-hazardous option for removing paint from a variety of surfaces.
When using any paint stripper, always follow the manufacturer’s instructions, and make sure the area is well-ventilated to ensure safety during the process.
Simple, Effective Alternatives
For a more DIY approach, common household items can be effective paint removers without the need for harsh chemicals. Here are two natural methods you can try.
- Baking Soda and Water: This method is ideal for removing paint from smaller items like door hardware or tools. Simply boil water, add a good amount of baking soda, and let the item soak. The heat and baking soda will help soften and lift the paint for easy removal. For larger surfaces, you can create a paste of baking soda and water and apply it to the painted area, letting it sit for a while before scrubbing it off.
- Vinegar: White vinegar is another excellent alternative for loosening paint. Heat up a small amount of vinegar and apply it to the painted surface using a brush or sponge. The acidity in the vinegar helps to soften the paint, making it easier to scrape off. This method is particularly effective for water-based paints and is gentle on most surfaces.
Both baking soda and vinegar are non-toxic, widely available, and won’t leave harmful residues, making them great choices for eco-friendly paint removal.
Complying with NZ’s Environmental Regulations
Proper disposal of paint waste is crucial to protecting the environment. In New Zealand, there are specific guidelines and regulations around disposing of paint and paint-related materials. Here’s how to ensure you dispose of your paint waste sustainably.
- Dry Out Leftover Paint: If you have small amounts of leftover paint, let it dry out by leaving the can open in a well-ventilated area. Once it’s fully dried, you can dispose of it with regular household waste. Just make sure to check with your local council as some areas may have specific guidelines.
- Use Paint Recycling Services: In many parts of New Zealand, there are recycling programs specifically for paint and paint cans. Look for local drop-off points or services that accept leftover paint for recycling, which helps to reduce landfill waste.
- Dispose of Paint Thinners Responsibly: Paint thinners and solvents should never be poured down the drain, as they can pollute waterways. Instead, store them in a sealed container and check with your local hazardous waste collection service for safe disposal.
- Recycling Paint Cans: Empty paint cans are typically recyclable through your local recycling program. Be sure to remove any excess paint residue before placing them in the recycling bin.
Following these steps not only helps keep NZ clean and green but also ensures you’re complying with national environmental standards. By choosing non-toxic paint strippers, opting for natural removal methods, and disposing of paint waste responsibly, you can significantly reduce the environmental impact of your home improvement projects. Whether you’re stripping paint from an old piece of furniture or revamping your home’s interior, these eco-friendly options will help you do the job while protecting New Zealand’s environment.

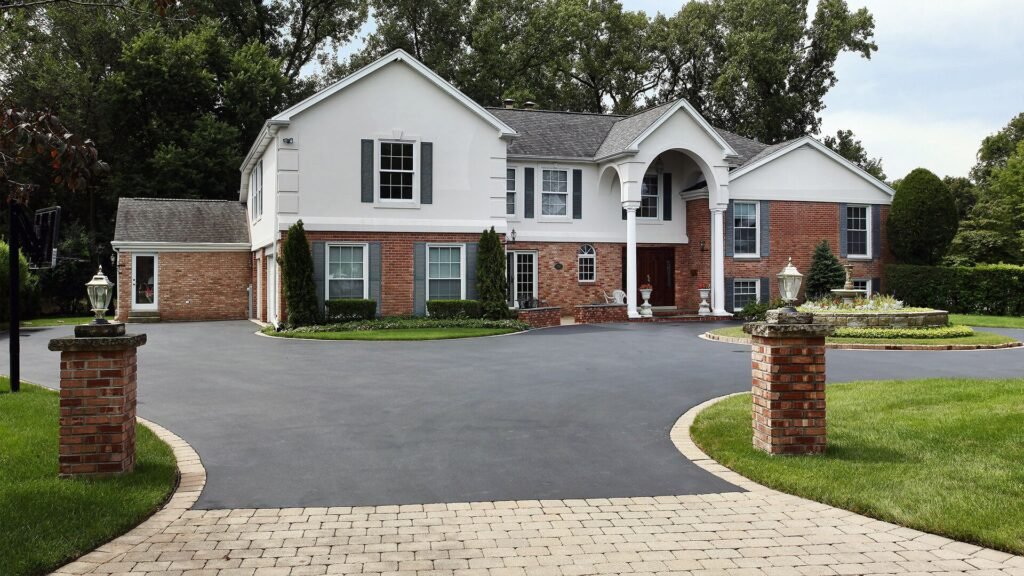
Maintaining Your Concrete Surface
Maintaining Your Concrete Surface
Once you’ve successfully removed paint from your concrete surface, it’s essential to follow up with proper aftercare to maintain the integrity and longevity of the area. Below, we’ll discuss the crucial steps you need to take for cleaning, sealing, and protecting your concrete surface.
Properly Cleaning the Concrete After Paint Removal
After paint removal, it’s vital to clean your concrete thoroughly. Leftover paint residue, cleaning solutions, or other debris can penetrate the porous surface of the concrete and cause stains, weakening its structure over time. Here’s how to clean up after paint removal.
- Rinse the Surface: Begin by rinsing the concrete surface with clean water to remove any remaining chemicals, dust, or paint particles. A pressure washer is ideal for this, as it ensures deep cleaning and removes even the smallest particles.
- Use a pH-Neutral Cleaner: After rinsing, apply a pH-neutral cleaner to prevent damage to the concrete. Harsh chemicals can break down the concrete’s surface, leading to erosion over time. Scrub the cleaner into the surface using a stiff bristle brush, focusing on any areas that appear discolored or stained.
- Rinse Again: After scrubbing, thoroughly rinse the concrete once more with clean water. It’s important to ensure that no cleaner or debris remains, as this can seep into the surface and cause discoloration or damage later on.
- Drying: Allow the concrete to air dry completely. Depending on the climate, this could take a few hours to a day. Proper drying ensures the surface is ready for the next step—sealing.
Sealing Concrete
Sealing your concrete after paint removal is a crucial step to protect it from future spills, stains, and weathering. Concrete is naturally porous, which means it absorbs liquids easily. Over time, unsealed concrete can develop cracks, stains, and other forms of damage, especially in high-traffic areas like driveways, patios, and walkways. Here are the key benefits of sealing your concrete after paint removal.
- Prevents Stains: A sealant creates a protective barrier that prevents substances like oil, grease, or paint from penetrating the surface. This is particularly important for outdoor areas such as driveways and patios, which are prone to spills and stains from vehicles or BBQs.
- Reduces Water Damage: Concrete can absorb water, which leads to cracking and damage during freeze-thaw cycles. Sealing helps reduce water absorption, preventing these cracks and extending the life of your concrete surface.
- Enhances Durability: Sealing your concrete improves its resistance to wear and tear, especially in high-traffic areas. This makes it a valuable investment for areas like garages, driveways, and sidewalks, where the surface is regularly exposed to vehicles, foot traffic, and heavy loads.
- Improves Appearance: Concrete sealers can enhance the overall look of your surface, giving it a clean, polished appearance. There are different types of sealers available, some of which can add a glossy finish, while others maintain the natural matte look of the concrete.
Local Product Suggestions
When it comes to choosing a concrete sealer in New Zealand, it’s important to select a product that suits your specific needs. Below are some top-rated concrete sealers available at local NZ stores
- Cemix Concrete Sealer: Available at Bunnings, this water-based acrylic sealer is ideal for both interior and exterior use. It provides a durable, clear finish that protects against oil, water, and dirt penetration. It’s especially useful for high-traffic areas like patios and driveways.
- Sika Water Repellent Seal: This sealer, available at Mitre 10, is designed to protect concrete surfaces from water and moisture damage. It’s a great option if you live in a region with heavy rainfall or if your concrete is exposed to outdoor elements.
- Wattyl Solagard Clear Sealer: This product, available at PlaceMakers, offers UV protection, making it perfect for outdoor areas. It helps preserve the look of your concrete by preventing fading and weathering caused by the sun’s rays.
- Resene Concrete Clear: If you’re looking for a sealer that enhances the appearance of your concrete while offering protection, this product from Resene is a solid choice. It adds a subtle sheen to the surface while preventing stains and water damage.
Maintaining your concrete surface after paint removal is essential for ensuring its long-term durability and appearance. Proper cleaning will prevent staining and damage, while sealing the concrete will protect it from future spills, water damage, and wear. Whether you choose an acrylic, water-based, or UV-resistant sealer, investing in the right product will extend the life of your concrete, especially in high-traffic areas like driveways and patios. For those in New Zealand, options like Cemix, Sika, Wattyl, and Resene offer reliable protection for your concrete surfaces. Be sure to follow the manufacturer’s instructions for the best results, ensuring your concrete stays clean, protected, and looking great for years to come.

Common Mistakes To Avoid When Removing Paint From Concrete
When it comes to removing paint from concrete, there are several common mistakes that can negatively impact both the quality of your results and the safety of the process. Avoiding these pitfalls will help ensure a smoother, more effective paint removal process and protect both your surfaces and yourself. Here’s a closer look at what you should steer clear of.
Over-scrubbing or Using Too Much Pressure
One of the biggest mistakes people make is thinking that more force equals better results. While scrubbing is necessary for removing stubborn paint, over-scrubbing or applying too much pressure can actually damage the concrete surface. Concrete may seem tough, but excessive force can cause it to chip or erode, leaving unsightly marks that are difficult to repair. Instead, use a moderate amount of pressure and allow the paint remover to do most of the work. Gentle scrubbing with the right tools, like a stiff-bristled brush, will provide better results without harming the concrete.
Using the Wrong Paint Remover
Another frequent error is using a paint remover that isn’t designed for concrete surfaces or for the specific environmental conditions in New Zealand (NZ). Not all paint removers are created equal, and some are more effective on certain surfaces than others. Choosing the wrong product can lead to poor results, wasted time, and potential damage to the concrete. It’s crucial to select a remover that’s formulated for concrete and takes into account the climate and conditions in NZ. Always check the label or consult with a professional to ensure you’re using the right product for the job.
Skipping Safety Gear
Paint removers often contain strong chemicals that can be hazardous if proper precautions aren’t taken. Unfortunately, one of the most overlooked steps in the paint removal process is the use of safety gear. Failing to protect yourself with the right equipment, such as gloves, goggles, and masks, can expose you to harmful fumes or skin irritation. Safety should always come first especially when dealing with chemical-based products. Even if the job seems small, always wear the recommended protective gear to shield yourself from potential health risks.
Avoiding these common mistakes such as over-scrubbing, using the wrong paint remover, and skipping safety gear can make a big difference in both the efficiency and safety of your paint removal project. By taking the time to understand the proper techniques and tools, you’ll ensure a successful and smooth process while keeping your concrete surfaces in great condition.

FAQs: About How To Get Paint Off Concrete NZ
How long does it take to remove paint from concrete?
The time it takes to remove paint from concrete depends on the size of the area, the type of paint, and the method you choose. Simple scrubbing with soap and water may take a few hours for small areas, while methods like using paint strippers or power washing can take several hours to a day. For more complex methods like sandblasting or chemical removers on large areas, it could take longer, especially if multiple applications are needed.
Can I use vinegar to remove paint from concrete?
Yes, vinegar can be used as a natural solution to help loosen paint from concrete. It works best on water-based paints and smaller, less stubborn stains. To use vinegar, heat it up and apply it to the painted area, letting it sit for about 10-15 minutes before scrubbing. However, for more extensive or oil-based paint spills, stronger solutions may be required.
Will paint remover damage my concrete?
Most paint removers, when used correctly, will not damage concrete surfaces. However, it’s important to follow the manufacturer’s instructions and test the product on a small, inconspicuous area first. Some harsh chemical paint removers could discolor or weaken older or more porous concrete if not applied properly. Eco-friendly or non-toxic options are often gentler on concrete.
Can I use a power washer to remove paint from concrete?
Yes, a power washer is an effective method for removing paint from concrete, especially on larger surfaces like driveways or patios. It uses high-pressure water to break up and wash away paint. However, you need to be cautious with the pressure settings to avoid damaging the concrete surface. Generally, a medium-high setting works well, but always test in a small area first.
Is it necessary to seal the concrete after removing paint?
It’s highly recommended to seal the concrete after removing paint, especially if the area is exposed to outdoor elements or heavy traffic. Sealing helps protect the surface from future stains, weathering, and wear. It also makes the concrete easier to clean and maintain in the long run.
Can I remove spray paint from concrete using these methods?
Yes, most of the methods mentioned, such as using paint strippers, scrubbing with soap and water, or power washing, are effective for removing spray paint from concrete. If the spray paint is particularly stubborn, using a chemical paint remover specifically designed for concrete or sandblasting can be helpful.
Are there eco-friendly paint removal options available in New Zealand?
Yes, there are eco-friendly paint removers available in New Zealand. Products like Dumond Smart Strip or Resene’s eco-friendly paint removers are effective and less harmful to the environment. These biodegradable solutions work by breaking down the paint without releasing harmful chemicals into the atmosphere or water systems.
Should I hire a professional to remove paint from concrete?
If the painted area is large, if the paint has deeply penetrated the concrete, or if you’re unsure about handling chemicals or equipment, it may be worth hiring a professional. Sandblasting and chemical stripping on large surfaces can be labor-intensive and tricky, so a professional’s expertise may save time and prevent damage.
What is the best method to remove paint from old concrete?
For older concrete surfaces, it’s essential to be careful not to damage the material. Softer approaches like using an eco-friendly paint remover or scrubbing with soap and a wire brush are recommended. For more stubborn paint, chemical removers designed for concrete may be necessary, but always test a small area first. Avoid high-pressure power washing or aggressive sandblasting, which could damage older, worn concrete.
Can I use a heat gun to remove paint from concrete?
Yes, a heat gun can be used to soften paint on concrete, making it easier to scrape off. This method works well on smaller areas and when dealing with paint that’s only lightly adhered to the surface. However, it’s important to exercise caution when using a heat gun to avoid damaging the concrete or causing burns.
Conclusion
It’s important to remember that selecting the right method for removing paint from concrete surfaces depends heavily on the size of the project and the type of paint involved. From chemical paint strippers and power washing to sandblasting and manual scraping, each technique has its own advantages depending on the situation. Smaller areas with light coatings may benefit from simpler, less abrasive methods, while larger projects or thicker, more stubborn paint layers could require more aggressive approaches like chemical removers or sandblasting. Ultimately, the key is choosing the method that aligns best with your specific needs. Don’t hesitate to try out the technique that seems most suitable for your project often, the right tools and methods will allow you to successfully restore the appearance of your concrete surface. Patience plays a significant role in the process, so be prepared for some trial and error, especially with particularly stubborn paint jobs. In some cases, a combination of methods might even be necessary to achieve the best results. With the proper approach, your concrete surface can look fresh and renewed in no time.
About the Author:
Mike Veail is a recognized digital marketing expert with over 6 years of experience in helping tradespeople and small businesses thrive online. A former quantity surveyor, Mike combines deep industry knowledge with hands-on expertise in SEO and Google Ads. His marketing strategies are tailored to the specific needs of the trades sector, helping businesses increase visibility and generate more leads through proven, ethical methods.
Mike has successfully partnered with numerous companies, establishing a track record of delivering measurable results. His work has been featured across various platforms that showcase his expertise in lead generation and online marketing for the trades sector.
Learn more about Mike's experience and services at https://theleadguy.online or follow him on social media: