Welcome to our complete guide on how to repair cracks in concrete in New Zealand, where we’ll walk you through the essential steps to keep your concrete surfaces in top condition. Whether you’re dealing with small hairline cracks in your driveway or more noticeable damage on your patio or foundation, repairing cracks promptly can save you from bigger, costlier issues down the line. In this guide, we’ll explore why cracks happen, the tools and materials you’ll need, and a straightforward step-by-step process for fixing them yourself, ensuring your concrete stays durable and looking great in NZ’s unique climate.
To repair cracks in concrete in NZ, start by cleaning the crack thoroughly using a wire brush or pressure washer. Next, widen the crack slightly with a chisel to allow for better filler adhesion. For deep cracks, insert a foam backer rod before filling with a concrete crack filler or epoxy. Smooth the surface with a trowel and let it cure for 24-48 hours. Finally, apply a concrete sealer to protect the repaired area from further damage. Regular maintenance can help prevent future cracks.
Table of Contents
Common Causes Of Concrete Cracks In New Zealand
Concrete is a highly durable and versatile material, widely used in construction across New Zealand. However, despite its strength, concrete is not immune to cracking. Various factors can contribute to this issue, some of which are specific to the unique environmental and geological conditions in NZ. Below, we’ll explore the most common causes of concrete cracks in New Zealand and why they occur.
Wear and Tear
Concrete surfaces, whether in residential driveways, commercial floors, or pavements, are exposed to continuous stress over time. Daily foot traffic, vehicles, and heavy equipment gradually wear down the surface, leading to minor or significant cracking. In high-traffic areas, such as parking lots or industrial facilities, the strain is even more intense. Over time, this natural deterioration becomes one of the most common causes of cracks in concrete across New Zealand.
New Zealand Weather Conditions
New Zealand’s climate plays a major role in the formation of cracks in concrete. The country experiences a wide range of weather patterns, from heavy rainfall and humidity to temperature fluctuations that affect concrete surfaces.
- Rain and Humidity: Excess moisture can seep into the concrete, causing the material to expand and contract. Over time, this weakens the concrete’s structure, leading to cracks.
- Temperature Changes: Sudden changes in temperature, particularly in colder regions, can cause concrete to expand and contract at a rapid rate. This is especially problematic during the freeze-thaw cycle in regions like the South Island. When water freezes inside the concrete and then thaws, it creates internal pressure that can enlarge existing cracks or form new ones.
The weather in New Zealand, particularly in coastal and mountainous areas, is a significant contributor to concrete degradation. Homeowners and business operators should be particularly vigilant in regions where temperature swings and moisture are common.
Soil Movement and Earthquakes
New Zealand sits on the Pacific Ring of Fire, meaning the country experiences frequent seismic activity. Even minor earthquakes or ground shifts can have a considerable impact on concrete structures. These shifts cause the ground beneath the concrete to move or settle unevenly, leading to cracks on the surface.
- Soil Movement: In some regions, soil can naturally expand or contract due to moisture levels, further stressing the concrete slabs or foundations.
- Earthquakes: While major earthquakes can cause immediate and visible damage, even minor seismic activity can create subtle shifts beneath concrete surfaces. Over time, these movements weaken the concrete and result in cracks. In New Zealand, where earthquakes are a regular concern, this is a prevalent issue.
Improper Installation
Proper installation is crucial for ensuring the longevity of concrete structures. Unfortunately, improper installation practices are a leading cause of concrete cracks. This can happen when concrete is not mixed properly, not reinforced adequately, or not allowed to cure correctly.
- Poor Mixing: If the concrete mixture has too much or too little water, the strength and durability of the concrete can be compromised. This leads to cracks forming sooner than expected.
- Lack of Reinforcement: Concrete should be reinforced with steel bars or mesh, especially for load-bearing structures. When reinforcement is inadequate, the concrete becomes more prone to cracking under pressure.
- Curing Issues: Proper curing is essential for concrete to reach its full strength. If it dries too quickly, especially in hot weather, or if it’s exposed to rain during the curing process, the concrete can develop shrinkage cracks.
In New Zealand, these issues are particularly significant, as many properties are built on diverse terrains with varying environmental conditions. A poor installation job can quickly lead to significant issues down the line, with cracks being one of the most obvious signs of improper work.
Concrete cracks are a common occurrence in New Zealand, driven by factors such as natural wear and tear, extreme weather conditions, soil movement, seismic activity, and improper installation. Understanding these causes can help property owners take preventative measures or address issues early to maintain the integrity of their concrete surfaces. Regular inspections, quality installation, and taking environmental factors into account can help mitigate the risks of cracking and prolong the lifespan of concrete structures in New Zealand’s unique landscape. By knowing these causes, you can better protect your investment and ensure that your concrete structures remain in excellent condition for years to come.
Assessing The Cracks – When To Repair Vs. Replace
When it comes to concrete surfaces, cracks are inevitable over time. However, understanding the type and severity of the crack is crucial in deciding whether a repair is sufficient or if a replacement is necessary. Let’s break down the key aspects of assessing concrete cracks so you can make informed decisions about maintenance and repairs.
Types of Cracks in Concrete
Before determining whether to repair or replace, it’s essential to recognize the different types of cracks you might encounter.
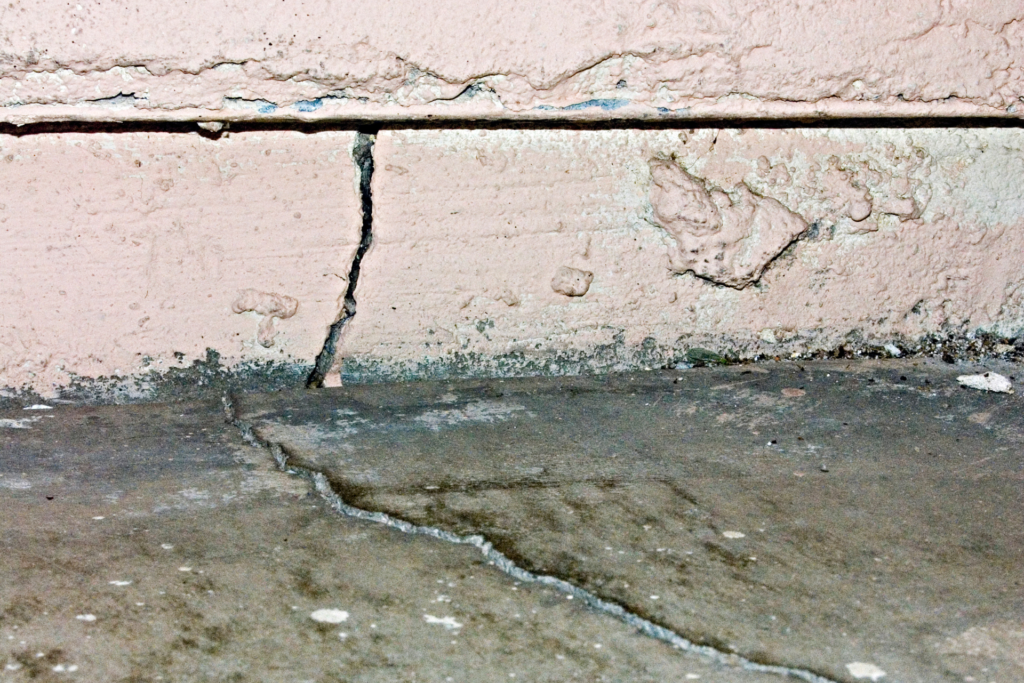
- Hairline Cracks: These are thin, surface-level cracks that are primarily cosmetic. They often occur as the concrete settles or experiences minor stress. Though they may look concerning, hairline cracks don’t typically compromise the structural integrity of the concrete. A simple repair, such as a crack filler or sealant, can usually address these minor flaws, preventing moisture infiltration and prolonging the lifespan of the surface.
- Structural Cracks: Structural cracks run deeper than hairline cracks and are a bigger cause for concern. These cracks suggest that there may be issues with the foundation or the load-bearing capacity of the concrete. If left unaddressed, structural cracks can expand, leading to more significant problems such as further damage or even collapse. Immediate repair is necessary, and in many cases, you may need professional intervention to ensure the issue doesn’t worsen.
- Expansion Joint Cracks: Concrete is often designed with expansion joints to accommodate temperature-related expansion and contraction. Cracks forming along these joints are relatively normal but can sometimes indicate a need for maintenance. Filling these cracks with a joint sealant can prevent further damage from water penetration or freeze-thaw cycles.
Measuring Width and Depth
Not all cracks require the same level of attention. Identifying the severity of a crack will help you determine the appropriate course of action. The width and depth of the crack are critical indicators.
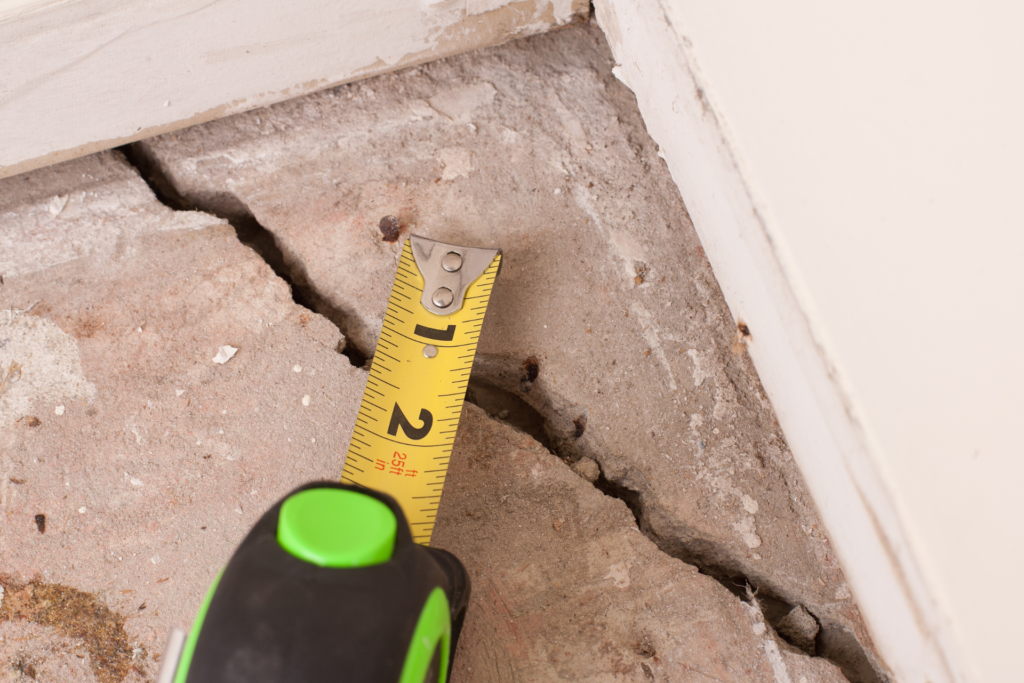
- Measuring Width: For surface-level cracks, a simple ruler or crack gauge can be used to measure the width. Cracks that are less than 1/4 inch (6 mm) wide are typically not dangerous and can be repaired using DIY methods, such as applying crack fillers or epoxy injections. These small cracks are usually caused by shrinkage during curing or minor settlement issues.
- Measuring Depth: The depth of a crack can often be harder to assess, but it’s equally important. A deep crack that goes all the way through a slab can indicate structural issues, even if the surface crack appears minor. Cracks deeper than 1/2 inch (12 mm) or those that affect multiple areas of a concrete surface should be inspected by a professional to determine the underlying cause and the best repair approach.
When to Replace the Concrete
There comes a point where repairing cracks is no longer sufficient, and replacement may be the more cost-effective, long-term solution. Here’s a quick guide to help determine when it’s time to consider replacing your concrete.
- Multiple or Widespread Cracks: If your concrete surface has many cracks across a wide area, patching each one individually may not be effective. This situation indicates that the overall integrity of the concrete is compromised, and it might be better to replace the entire slab.
- Cracks Wider than 1/4 inch (6 mm): If you have cracks wider than 1/4 inch, they may signal significant structural damage. These larger cracks allow moisture to penetrate, which can weaken the concrete over time and may require professional intervention or replacement.
- Uneven Surfaces or Settling: If you notice that parts of your concrete surface are uneven or have sunk due to settling, this may indicate a deeper foundation issue. In cases where settling has occurred, especially if it affects the safety of the surface (e.g., tripping hazards on sidewalks or driveways), replacement is often the best solution.
- Continuous Deterioration: If repairs to existing cracks fail to last or new cracks continually appear after fixing, the underlying issue may be too severe for simple fixes. Persistent cracking is a sign that the concrete’s lifespan is nearing its end, and replacement will provide a more durable and long-lasting solution.
Understanding the type and severity of cracks is crucial when deciding between repairing or replacing your concrete. For smaller, superficial cracks, a quick DIY repair might be all you need. However, for more severe structural cracks or widespread damage, it’s often better to consult a professional and consider replacement to avoid further complications down the road.
Materials And Tools Needed For Concrete Crack Repair
When it comes to repairing concrete cracks, having the right materials and tools is crucial for ensuring a long-lasting and effective fix. Whether you’re working on small cracks or large areas of damage, using the proper equipment will make the job easier and improve the durability of your repair. In this section, we’ll break down all the tools and materials you’ll need for a successful concrete crack repair, as well as a few optional items that can enhance the final result.
Tools You’ll Need
- Concrete Cleaner (Pressure Washer or Stiff Brush): Before any repair work can begin, it’s essential to clean the area thoroughly. A pressure washer is ideal for blasting away dirt, debris, and loose material from the crack, but a stiff brush can also do the trick if you don’t have access to one. Clean surfaces ensure that the repair materials bond properly to the concrete.
- Chisel and Hammer (for Widening Cracks, if Necessary): Some cracks need to be widened slightly to allow the repair material to fully penetrate and bond with the concrete. A chisel and hammer can be used to gently open up the crack and remove any loose or flaking material, creating a solid base for the repair.
- Caulk Gun: A caulk gun is essential for applying crack fillers or sealants into narrow or hard-to-reach cracks. This tool helps you apply the material evenly and with precision, ensuring a clean finish without wasting the product.
- Trowel or Putty Knife: Once the filler or repair mix is in place, a trowel or putty knife can be used to smooth the surface. These tools help you spread the material evenly across the crack, ensuring that it blends seamlessly with the surrounding concrete.
- Protective Gear (Gloves, Safety Glasses): Safety should always come first. When working with concrete repair products, which may contain chemicals or rough particles, protective gear like gloves and safety glasses is essential to prevent injury.
Materials
- Concrete Repair Mix or Epoxy (Available at Most NZ Hardware Stores): For most cracks, a concrete repair mix or epoxy is the primary material you’ll need. These are specially formulated to bond with existing concrete and provide a durable, long-lasting repair. These products are readily available at hardware stores in New Zealand, and they come in different varieties based on the size and type of crack.
- Crack Fillers (Silicone-Based or Polyurethane Sealants): Silicone-based or polyurethane sealants are great for filling smaller cracks or those that might experience some movement. These sealants are flexible, water-resistant, and can be easily applied using a caulk gun. They are especially useful for outdoor repairs, where temperature changes can cause expansion and contraction of the concrete.
- Backer Rod (For Deeper Cracks): For deeper or wider cracks, a backer rod is used to fill the bottom of the crack before applying sealant or repair mix. This ensures that the material stays in place and doesn’t sink down into the crack, which helps create a more stable repair.
- Concrete Resurfacer (For Larger Repair Areas): If you’re dealing with a larger area of damage, a concrete resurfacer may be necessary. This material is used to cover and repair larger sections of cracked or pitted concrete, restoring the surface to a smooth and even finish.
Optional Materials
- Sealant for Water Protection: If your concrete surface is exposed to the elements, applying a water-resistant sealant after the repair can help protect it from further damage. This is particularly important in areas prone to heavy rain or freezing temperatures, where water can penetrate cracks and cause them to expand.
- Color-Matching Products (To Blend with Existing Concrete): For a seamless repair that blends in with your existing concrete, consider using color-matching products. These are designed to match the shade of your concrete, making the repair less noticeable. This step is especially useful for highly visible areas, such as driveways, patios, or walkways.
By gathering the right tools and materials before you start, you’ll be well-equipped to tackle any concrete crack repair. Proper preparation and the use of high-quality products ensure that your repair is not only effective but also long-lasting.
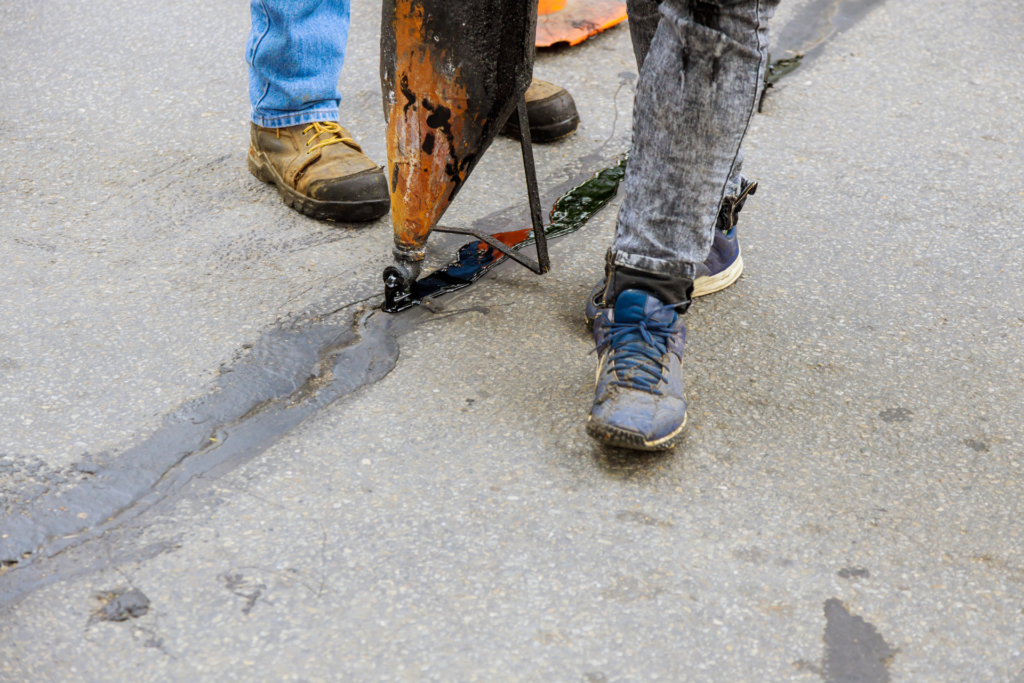
Step-By-Step Guide To Repairing Concrete Cracks
Concrete cracks are not only unsightly but can also lead to further structural damage if left unchecked. Whether you’re dealing with hairline fractures or larger gaps, repairing cracks in concrete is essential to maintaining the integrity of your surfaces. In this guide, we’ll walk you through the process, step by step, ensuring a lasting repair that blends seamlessly with the surrounding area.
Cleaning the Area
Before you dive into repairing a concrete crack, it’s crucial to prepare the area by cleaning it thoroughly. Proper cleaning ensures that the repair material will adhere effectively, leading to a longer-lasting fix.
- Why Cleaning is Crucial: Removing debris, dust, oils, and dirt from the crack is a vital step. If any contaminants are left behind, they can prevent the repair material from bonding properly, resulting in a weak repair that may not last. By cleaning the area first, you’re giving the filler or concrete patch the best possible chance of forming a strong, long-lasting seal.
How to Clean the Crack
- For larger cracks: Use a wire brush to scrub away loose particles, dust, and dirt. Alternatively, a pressure washer can be highly effective for more extensive damage.
- For smaller or hairline cracks: A compressed air canister or vacuum works well to blow out any dust or dirt lodged within the crack. The goal is to have a completely clean and dry area before applying any filler.
Widening for a Stronger Bond
Once the crack is cleaned, it’s time to prepare it for filling. Depending on the size and depth of the crack, you may need to modify the crack slightly to ensure the repair material adheres properly.
- Opening the Crack (for Hairline Cracks): Hairline cracks, though small, need to be widened slightly to allow the filler to bond well. Using a chisel and hammer, gently tap along the crack to open it just a little. This helps create enough space for the filler to take hold, ensuring a more durable repair.
- Backer Rod Application (for Deep Cracks): If the crack is deep, you’ll want to prevent the repair filler from sinking too far down. A backer rod, which is a foam rod, can be inserted into the crack to control the depth of the repair material. This technique ensures that the filler remains at the correct level for an even, smooth finish.
Applying the Right Material
After cleaning and preparing the crack, the next step is to fill it with the appropriate repair material, depending on the size and depth of the crack.
For Small Hairline Cracks
- Use a concrete crack filler or liquid caulk specifically designed for small cracks.
- Apply the filler using a caulk gun, running a bead of the material along the length of the crack.
- Once filled, use a putty knife to smooth the surface, ensuring that the filler is flush with the surrounding concrete.
For Larger Cracks
- Follow the manufacturer’s instructions to mix the concrete repair product to the proper consistency.
- Use a trowel to apply the mixture into the crack. Press firmly to ensure the material is packed in well and fills the crack entirely.
- Once filled, smooth the surface using the trowel. Feather the edges of the repair to blend the patch with the surrounding concrete, which will help create a seamless finish.
Ensuring Longevity
Curing is the final but critical step in the concrete crack repair process. Without proper curing, even the best repair work can fail prematurely.
- Curing Time: Most concrete repair products require between 24 and 48 hours to fully cure. During this time, it’s important to avoid walking or driving on the repaired area to allow the material to harden fully. Refer to the specific product’s instructions for the exact curing time, as this can vary.
- Protecting During Curing: To ensure the repaired crack cures without any issues, you might need to protect it from external elements like rain or debris. If the weather is unpredictable or you’re concerned about contamination, covering the repair with a tarp or plastic sheet can prevent potential damage during the curing process.
Repairing concrete cracks is a straightforward but detailed process that requires attention to each step for a successful result. By thoroughly cleaning, preparing, filling, and allowing the area to cure properly, you can ensure a long-lasting and smooth repair that blends perfectly with your concrete surface. Follow these steps to maintain the structural integrity of your concrete and prevent further damage down the road.
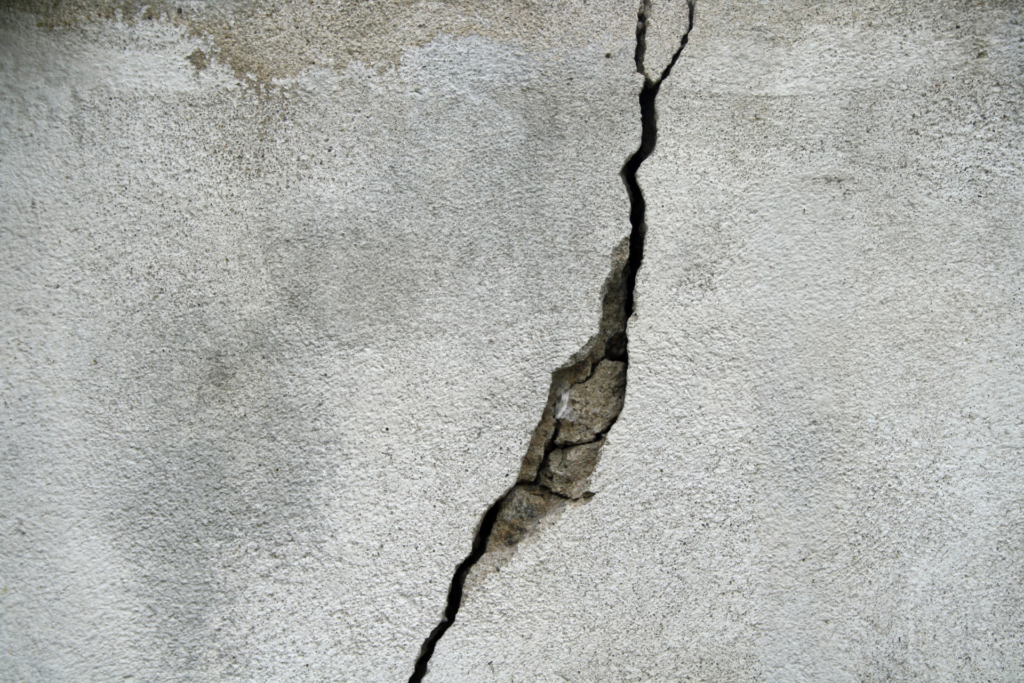
Sealing And Protecting Repaired Concrete
Concrete repairs don’t just end when the cracks are filled or the surface is patched. To ensure longevity and durability, it’s crucial to protect the repaired area with a proper sealing process. In this guide, we’ll explore why sealing is essential and provide step-by-step instructions on how to apply a concrete sealer to your newly repaired surfaces, with special tips tailored for New Zealand’s unique weather conditions.
Why Sealing is Important
Sealing a repaired concrete surface serves as the final protective layer. Concrete is naturally porous, which means it can absorb water and other elements that can weaken it over time. When you apply a sealant, you create a protective barrier that shields the repaired area from various environmental hazards. Let’s break down the primary reasons why sealing is essential.
- Protection from Water Damage: Water infiltration is one of the most common causes of concrete deterioration. If moisture seeps into the repaired area, it can lead to further cracking, weakening the structure and compromising the repair work. A concrete sealer prevents water from penetrating the surface, reducing the risk of future damage.
- Guarding Against Freeze-Thaw Cycles: In regions like New Zealand, where winter temperatures can dip, concrete is vulnerable to freeze-thaw cycles. Water that enters the concrete’s pores can freeze and expand, leading to cracks. By sealing the concrete, you minimize the amount of moisture that can get trapped inside, protecting it from freeze-thaw damage.
- UV Protection: Constant exposure to UV rays from the sun can break down concrete over time. This is especially relevant in outdoor areas. A quality sealer helps block these harmful rays, preserving the surface’s strength and appearance for longer.
- Enhances Durability and Appearance: Beyond just protection, sealing can also enhance the overall appearance of your concrete by providing a smooth finish. Some sealers even come with added benefits like resistance to stains and chemicals, further extending the lifespan of your repaired concrete.
Applying a Concrete Sealer:
Now that you understand the importance of sealing your repaired concrete, let’s walk through how to do it. Follow these steps to ensure the best results for your project.
Allow the Repair to Fully Cure
Before you even think about applying a sealer, ensure the concrete repair has fully cured. The curing process can take anywhere from 24 hours to several days, depending on the type of repair product used and the weather conditions. If the concrete isn’t fully cured, the sealer may not adhere properly, which can lead to peeling or ineffective protection.
Choose the Right Sealer for Your Climate
New Zealand’s climate can vary widely, from the wet and windy regions of the South Island to the warmer, more temperate areas in the North Island. Because of these variations, selecting the right sealer is crucial for the long-term success of your repair.
- Acrylic Sealers: These are great for enhancing the appearance of decorative concrete. They provide a good level of UV protection and work well in areas with moderate climates.
- Penetrating Sealers: Ideal for wet environments, penetrating sealers are designed to seep into the concrete and form a barrier within the pores. They are perfect for areas that experience a lot of rain, as they offer excellent water resistance.
- Epoxy or Polyurethane Sealers: These are heavy-duty options often used in industrial or high-traffic areas. They offer superior protection from chemicals, oils, and extreme weather conditions but may not be necessary for every home project.
Clean the Surface
Before applying any sealer, the concrete surface must be completely clean and free from dust, dirt, and any debris. Use a broom, blower, or pressure washer to ensure the area is spotless. If there are any oil stains or previous sealers on the surface, you may need to use a concrete cleaner or stripper to remove them.
Apply the Sealer Evenly
Once the surface is clean and dry, you can begin applying the sealer. Follow the manufacturer’s instructions for the best results, but here are some general tips.
- Use the Right Tools: A sprayer is often the easiest way to apply sealer evenly, especially over large areas. For smaller areas or more precise application, you can use a roller or brush.
- Apply Thin, Even Coats: It’s better to apply two thin coats than one thick one. This helps the sealer absorb better into the concrete and provides a more uniform finish.
- Work in Sections: If you’re sealing a large area, work in small sections to ensure you don’t miss any spots.
Allow Time for Drying and Curing
Once you’ve applied the sealer, allow it to dry according to the manufacturer’s recommendations. Drying times can vary depending on the type of sealer used and the weather conditions. Most sealers will dry to the touch within a few hours, but they may require several days to fully cure. Avoid heavy traffic on the sealed surface until it’s completely cured to ensure optimal protection.
Sealing your repaired concrete is a crucial step in ensuring the longevity of your hard work. By following these steps and choosing the right sealer for your environment, you’ll protect your concrete from the elements and extend its lifespan for years to come. Whether you’re dealing with the rainy conditions of Wellington or the sunny weather of Auckland, proper sealing will keep your concrete looking great and functioning well, no matter what nature throws at it.

Preventing Future Cracks
Taking proactive steps to prevent future cracks in concrete is essential for ensuring long-term durability. By following some simple guidelines and implementing preventative measures, you can significantly extend the life of your concrete surfaces. Here’s a comprehensive guide to keeping your concrete in great condition and avoiding potential damage down the road.
Regular Maintenance Tips
Proper maintenance plays a critical role in preventing cracks from forming or worsening. Here are a few practical tips to help you maintain the integrity of your concrete.
- Periodic Sealing: One of the most effective ways to protect your concrete surface is by sealing it regularly. Sealing acts as a protective layer, shielding the concrete from moisture, chemicals, and wear caused by daily use. Aim to seal your concrete every 2-3 years, or as recommended by the product manufacturer, to keep it in optimal condition.
- Routine Cleaning: Dirt, debris, and chemical spills can compromise the surface of your concrete, leading to premature wear. Make it a habit to sweep your concrete surfaces regularly and hose them down to prevent build-up. For tougher stains like oil or grease, use a concrete cleaner to avoid surface degradation.
- Avoid Overloading: While concrete is durable, it has its limits when it comes to weight. Avoid parking heavy vehicles, such as large trucks or RVs, on your driveway or other concrete surfaces. Excessive weight can stress the concrete, causing cracks over time. Consider installing concrete with a thicker slab in areas where you anticipate heavy loads.
Addressing Water Drainage
Water is one of the biggest culprits when it comes to concrete damage. Improper drainage can lead to water pooling on or around your concrete, which over time, weakens the material and leads to cracking. Here are a few ways to improve water drainage and prevent future issues.
- Ensure Proper Sloping: When installing concrete, it’s crucial that the surface is slightly sloped to direct water away from the structure. Flat surfaces allow water to sit, seeping into the concrete and causing freeze-thaw damage in colder climates. If your concrete already exists and doesn’t have the right slope, you might need to consider professional solutions like adding drainage channels.
- Install Gutter Systems: Rainwater runoff from your roof can accumulate around your concrete surfaces if not properly managed. Installing gutters and downspouts to divert water away from concrete areas can prevent long-term damage. Be sure that downspouts are directed at least 5-10 feet away from concrete slabs.
- Fix Drainage Issues Immediately: If you notice water pooling near your concrete, take action immediately. Poor drainage not only weakens the concrete but also encourages soil movement, which can further exacerbate cracking. Consider grading the surrounding landscape or installing French drains to help manage excess water.
Dealing with NZ Earthquake Zones
For those living in regions prone to seismic activity, such as New Zealand, taking extra precautions with concrete structures is essential. Earthquakes can put a lot of stress on concrete, leading to cracks or even structural failure. Here are some specialized tips for managing concrete in earthquake-prone areas.
- Reinforcing Concrete Structures: To increase the strength of concrete in earthquake zones, it’s recommended to use reinforced concrete. This involves adding steel rebar or wire mesh into the concrete to help it withstand the shifting forces caused by seismic activity. If you’re building a new structure, always work with a structural engineer to ensure it meets the required earthquake safety standards.
- Use Earthquake-Resistant Materials: Not all concrete is created equal. In earthquake zones, using high-quality, earthquake-resistant concrete can significantly reduce the risk of damage. This type of concrete is designed to have more flexibility and can better absorb the forces generated by earthquakes without cracking.
- Regular Inspections: Even with the best preventative measures, it’s important to regularly inspect your concrete for early signs of cracking. This is particularly true after an earthquake or a series of tremors. Addressing small cracks early can prevent them from becoming larger, more dangerous structural issues.
- Foundation Strengthening: For homeowners in NZ’s more active earthquake zones, it’s wise to consider reinforcing the foundation of your home. This might include techniques such as base isolation, which can reduce the transmission of seismic forces from the ground to the building. Strengthening your foundation helps protect not only the concrete but the overall structure of your home.
By staying proactive with these maintenance tips and precautions, you can significantly extend the lifespan of your concrete surfaces and protect them from future damage. Whether it’s through regular upkeep, proper drainage management, or addressing the specific challenges of living in an earthquake-prone area, taking these steps can help you avoid costly repairs and maintain the structural integrity of your concrete for years to come.
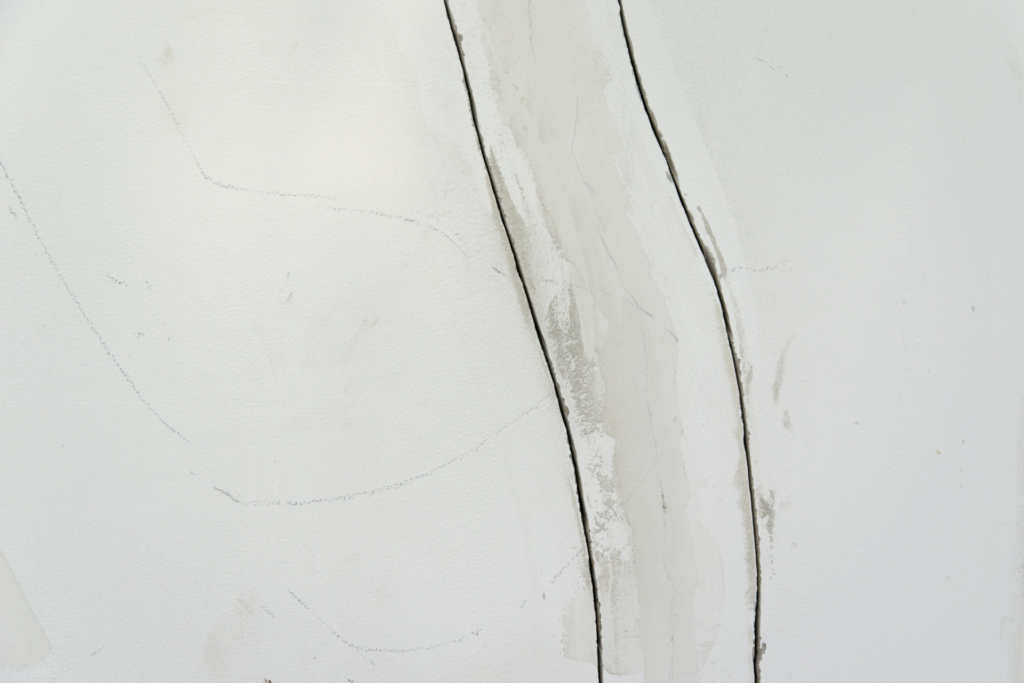
When To Call A Professional For Concrete Repairs
Concrete is a durable and robust material, but over time, it can develop issues that need attention. While some repairs can be handled by a DIY enthusiast, there are situations where professional expertise is necessary to ensure the longevity and safety of your property. Let’s break down when it’s time to call in a professional and how to find a reliable concrete repair expert in New Zealand.
When DIY Repairs Aren’t Enough
Many homeowners enjoy tackling small repairs themselves, and minor concrete issues such as hairline cracks or surface-level wear can often be fixed with a bit of effort and the right tools. However, it’s crucial to recognize the limits of DIY repairs. There are instances where the problem goes beyond what a typical homeowner can handle, particularly when it comes to structural concerns.
For example, if you notice deep or wide cracks in your concrete or if there’s noticeable movement in the foundation, it’s likely indicative of a more serious issue. These types of problems often suggest that the structural integrity of the concrete is compromised. In such cases, DIY methods might provide a temporary fix but won’t address the root cause, which could lead to further damage down the road. Other signs that it’s time to call a professional include.
- Significant foundation shifts: If your home or building shows signs of settling or shifting, it could point to foundational problems that require expert evaluation and repair.
- Large cracks or bulging: Cracks wider than ¼ inch or concrete that appears to be bulging can indicate a much deeper issue.
- Drainage problems or pooling water: If water is not draining properly around your concrete, it could cause further erosion and damage, which should be assessed by a professional.
Understanding your limits is important to avoid making a problem worse or potentially risking your safety. If you’re unsure, it’s always best to consult with a concrete repair specialist.
Finding a Reliable Concrete Repair Expert in New Zealand
When it’s time to bring in a professional, finding someone qualified and trustworthy is essential. With so many contractors available, knowing how to choose the right one can feel overwhelming. Here are some practical tips to help you find a reliable concrete repair expert in New Zealand.
- Look for Experience: Not all contractors specialize in concrete repair. Make sure to find a professional who has extensive experience in this specific area. Look for companies or individuals who have been working in the field for several years and have a solid track record.
- Check Credentials and Certifications: Reputable contractors should have the necessary qualifications and certifications. In New Zealand, professionals may be registered with organizations such as the New Zealand Concrete Contractors Association (NZCCA). Being affiliated with such organizations shows that the contractor adheres to industry standards.
- Read Reviews and Ask for References: Online reviews can provide insight into the reliability and quality of work a contractor offers. Platforms like Google Reviews or Trade Me can help you gauge customer satisfaction. Additionally, don’t hesitate to ask the contractor for references from previous clients to ensure they deliver on their promises.
- Get Multiple Quotes: It’s a good idea to obtain quotes from at least three different contractors. This allows you to compare prices, but more importantly, you can evaluate how each contractor plans to approach your repair. Be wary of any quotes that seem too good to be true, as they might indicate a lack of experience or the use of subpar materials.
- Ask About Warranties: A trustworthy concrete repair professional should offer warranties on their work. This shows that they stand by the quality of their repairs and are committed to ensuring the durability of the work they’ve done.
- Consider Local Expertise: Local contractors will have knowledge of New Zealand’s unique environmental factors, such as seismic activity, weather conditions, and soil composition. This expertise is invaluable in ensuring that your concrete repairs are tailored to withstand local challenges.
By following these tips, you’ll be well-equipped to find a qualified and trustworthy concrete repair professional in New Zealand. Whether you’re dealing with a small issue that requires expert attention or a larger, more complex project, hiring the right expert will ensure that your repairs are done safely and effectively.
While tackling some concrete repairs on your own can save you money, it’s important to recognize when a problem is beyond your capabilities. Structural cracks, foundational issues, and large-scale damage require the skills of a trained professional. Knowing your limits can prevent further damage to your property and save you from costly mistakes. When you do need to call in the experts, following the above tips will help you find a reliable and skilled concrete repair professional in New Zealand to get the job done right.
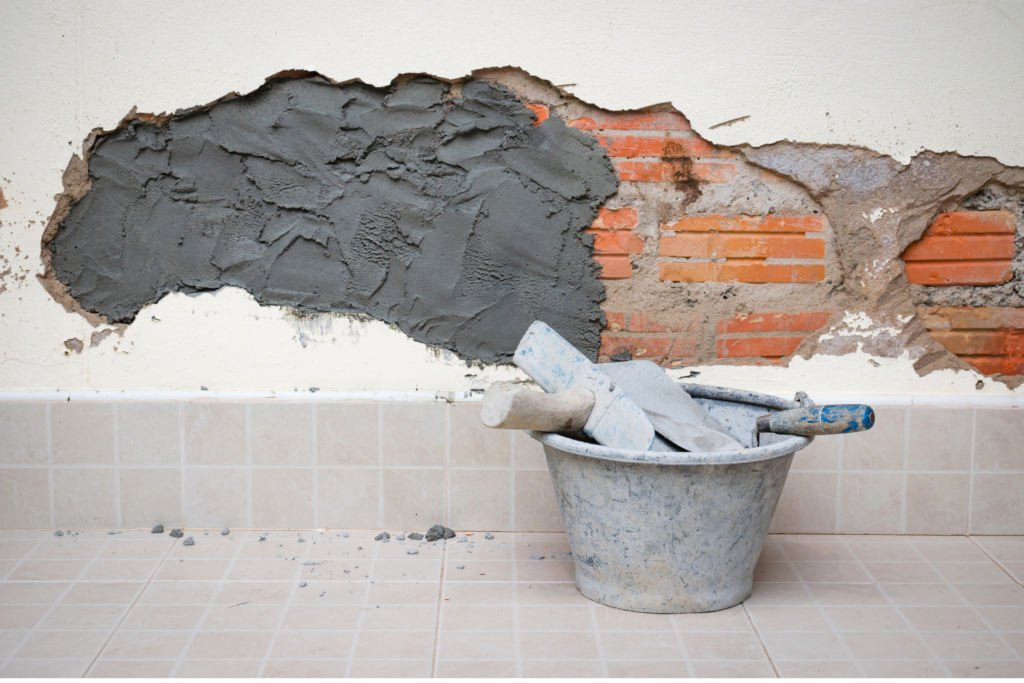
FAQs: About How To Repair Cracks In Concrete NZ
What causes concrete cracks in New Zealand?
Concrete cracks in NZ can be caused by several factors, including weather conditions (rain, freeze-thaw cycles), normal wear and tear, ground movement, and improper installation. New Zealand’s seismic activity and ground shifting can also lead to concrete cracking, especially in areas prone to earthquakes.
Are all concrete cracks a serious problem?
Not all concrete cracks are serious. Small, hairline cracks are often just cosmetic and can be repaired easily. However, deeper or wider cracks may indicate structural issues and need urgent attention to prevent further damage.
What tools and materials do I need to repair concrete cracks?
To repair concrete cracks, you’ll need some basic tools such as a pressure washer or wire brush, a caulk gun, a trowel, a chisel, and safety gear. Materials may include crack filler, concrete repair mix, a backer rod for deep cracks, and a concrete sealer.
Can I repair concrete cracks myself, or should I hire a professional?
You can repair small, non-structural cracks yourself using DIY methods and materials available at local hardware stores. However, if the cracks are large, deep, or potentially related to foundation problems, it’s best to consult a professional to assess the situation and prevent further damage.
How do I know if a crack is serious enough to need professional repair?
Cracks that are wider than 1/4 inch (6mm), go deep into the concrete, or cause uneven surfaces may require professional repair. If you notice multiple cracks or cracks in a pattern, these could indicate more severe structural issues.
What’s the best way to clean a crack before repairing it?
You should clean the crack thoroughly before starting any repair. Use a wire brush or pressure washer to remove any dirt, debris, and loose material. For small cracks, you can use compressed air or a vacuum to ensure the area is clean and ready for filling.
How long does it take for concrete crack repair to cure?
Curing times vary depending on the product you’re using, but most concrete repair fillers need 24 to 48 hours to fully cure. It’s important to avoid walking or driving on the surface until the repair is completely set.
Should I seal the repaired concrete?
Yes, applying a concrete sealer after the repair is essential. Sealing the concrete helps protect it from future water damage, weather conditions, and wear and tear. It can also help extend the life of the repair.
Can I use regular caulk to fill concrete cracks?
No, regular caulk is not suitable for concrete cracks. You should use a specially formulated concrete crack filler or sealant, such as a polyurethane or silicone-based product designed for concrete repair. These materials offer flexibility and durability, ensuring a longer-lasting repair.
How can I prevent future concrete cracks?
To prevent future cracks, ensure proper drainage around concrete surfaces, regularly clean and maintain the surface, and apply a sealer every few years. In areas prone to seismic activity, consider reinforcing concrete during installation to reduce the likelihood of cracking.
Conclusion
Keeping your concrete in top shape is essential to maintaining the integrity and appearance of your property. Addressing cracks and minor damage as soon as they appear can prevent more serious, costly repairs down the road. Early intervention is key because even small cracks can allow water to seep in, leading to further deterioration, weakening the structure, and causing long-term damage. If you’re confident in your skills, tackling these repairs on your own can be a rewarding and cost-effective project. Following a step-by-step guide for DIY crack repairs can save you time and money, and help you restore your concrete surfaces quickly. However, it’s important to recognize when a repair might be beyond your abilities. If the damage is more extensive, or if you’re uncertain about how to proceed, don’t hesitate to call in professional help to ensure the job is done right. After all, the goal is to protect your investment, and sometimes expert advice can make all the difference. If this post has been helpful, consider bookmarking it for future reference or sharing it with a friend who might be facing similar issues. And for those looking for a little extra guidance, feel free to download our free concrete repair checklist, which can help you stay on top of maintenance and keep your surfaces looking their best for years to come.
About the Author:
Mike Veail is a recognized digital marketing expert with over 6 years of experience in helping tradespeople and small businesses thrive online. A former quantity surveyor, Mike combines deep industry knowledge with hands-on expertise in SEO and Google Ads. His marketing strategies are tailored to the specific needs of the trades sector, helping businesses increase visibility and generate more leads through proven, ethical methods.
Mike has successfully partnered with numerous companies, establishing a track record of delivering measurable results. His work has been featured across various platforms that showcase his expertise in lead generation and online marketing for the trades sector.
Learn more about Mike's experience and services at https://theleadguy.online or follow him on social media:


