Welcome to your complete guide on how to remove oil stains from concrete in NZ! Whether it’s a pesky oil spill from your car or a buildup of stains on your driveway, tackling these marks can feel overwhelming, but with the right methods, it’s easier than you might think. In this post, we’ll walk you through effective, DIY-friendly techniques to lift oil stains and restore the look of your concrete, using products and tools readily available here in New Zealand. From simple household items to powerful cleaners, you’ll find practical solutions to suit any stain, so you can keep your driveway, garage, or patio looking fresh and stain-free.
To remove oil stains from concrete in NZ, start by sprinkling baking soda or kitty litter over the stain to absorb excess oil. Then, scrub with dish soap or a concrete cleaner using a stiff brush. For stubborn stains, apply a degreaser or consider pressure washing. Eco-friendly options, like vinegar and baking soda, also work well on fresh spills.
Table of Contents
Why Oil Stains Are Difficult To Remove
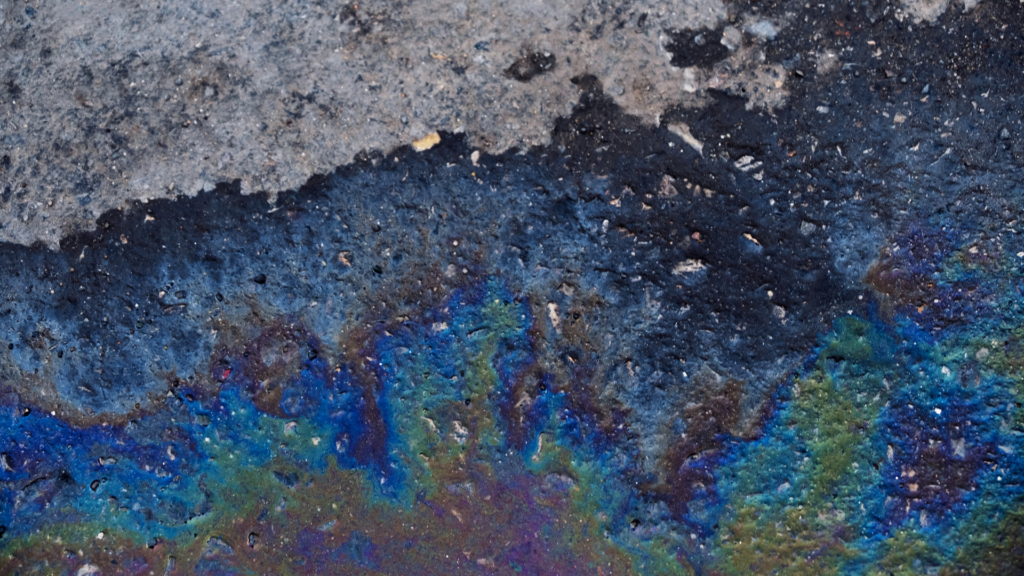
Understanding why oil stains on concrete are so stubborn starts with understanding the unique qualities of concrete itself. Concrete, though seemingly solid and impenetrable, is actually a highly porous material. This means it acts somewhat like a sponge, absorbing substances especially liquids like oil deep into its surface. When oil spills on concrete, it doesn’t just sit on top; it seeps into the tiny pores of the concrete, which is why these stains are so challenging to remove. As oil penetrates deeper into the concrete, it bonds with the material, creating a stain that isn’t easily lifted, even with typical cleaning solutions. Once oil seeps into concrete, it’s much harder to reach with surface cleaners, making removal a tricky process.
The Lasting Impact of Oil Stains on Concrete’s Condition
Leaving an oil stain untreated can lead to even more issues over time. When oil stains sit on concrete for extended periods, they risk becoming permanent. This happens because as time passes, the oil chemically bonds with the minerals in the concrete, making the stain not only visible but also harder to remove. Permanent stains don’t just affect the look of the surface; they can also impact the durability and lifespan of the concrete itself. Over time, embedded oil can weaken the structure of concrete, contributing to wear and tear. This makes prompt treatment essential not only to keep the surface looking clean but also to preserve the concrete’s strength.
Weather in New Zealand and Its Impact on Oil Stains
In New Zealand, specific weather conditions can make oil stains even more challenging to handle. High humidity levels, combined with frequent rain, mean that oil spills can be driven even deeper into the concrete by moisture. Rain, in particular, can help spread the oil further, expanding the stain and making it more difficult to manage. Moreover, because damp conditions slow down the drying of cleaning agents, it can be harder to fully lift oil from concrete in these environments. For Kiwi homeowners and businesses, understanding how local climate affects stain removal can help in choosing the best treatment method and timing for oil spills on concrete.
Preliminary Steps Before Removal
When tackling any stain removal project, preparation is crucial. Not only does it streamline the process, but it also ensures safety and the best possible results. Here’s a step-by-step breakdown of the preliminary actions that set you up for a successful cleaning job.
Safety Precautions: Protecting Yourself and Your Environment
Safety should always come first, especially when using cleaning agents or powerful tools. Here’s why gloves, goggles, and ventilation are non-negotiable.
- Gloves: protect your hands from harsh chemicals that can cause skin irritation or allergic reactions. Even some seemingly harmless household cleaners contain ingredients that can dry or damage skin over time.
- Goggles: guard your eyes from splashes, especially when working with high-pressure water or chemical solutions. A simple splash of cleaner in your eyes can lead to irritation or, worse, more severe eye injuries. Safety goggles are a wise investment for any cleaning task.
- Ventilation: is essential when working indoors with chemicals or fumes. Even products marketed as “mild” or “safe for indoor use” can release harmful vapors when confined in a poorly ventilated area. Ensure windows are open, and, if possible, set up a fan to keep fresh air circulating in the space.
Taking these precautions might seem like extra work, but they are simple steps that make a huge difference in ensuring you stay safe throughout the project.
Tools You’ll Need: Gather Your Essentials for Stain Removal
Having the right tools makes any stain removal job quicker, more efficient, and more effective. Here’s a breakdown of some essentials that can help lift and remove stains thoroughly.
- Absorbent Materials: For those fresh or wet stains, baking soda or kitty litter is incredibly effective. Both absorb moisture quickly, drawing the stain out before it settles into the material. Spread a generous layer of your chosen absorbent, let it sit for 15-30 minutes, and then sweep it up to remove as much of the stain as possible.
- A Stiff Brush: Once you’ve applied a cleaning solution, scrubbing with a stiff-bristled brush can help lift the stain from surfaces with texture, like concrete or brick. Avoid wire brushes on delicate surfaces, though, as they may scratch or damage the material.
- A Power Washer (if available): For outdoor surfaces or stubborn stains, a power washer is a game-changer. The high-pressure water blasts away dirt, grime, and even deeply embedded stains, leaving surfaces fresh and clean. If you don’t own one, consider renting a power washer, as it’s especially useful for concrete driveways, patios, or decks.
Each of these tools plays a unique role in stain removal, and having them on hand will ensure you’re ready for whatever cleaning challenges you encounter.
Test in a Small Area First: The Key to Preventing Unwanted Damage
Cleaning solutions are not always one-size-fits-all, and some materials react unexpectedly to certain chemicals or methods. Before applying any solution across a large area, test it in an inconspicuous spot. This precaution is particularly important for fabrics, carpets, and delicate surfaces, where discoloration or damage can occur if the cleaner is too strong or not compatible.
To do this
- Choose a small, hidden area and apply a small amount of the cleaning solution.
- Wait 10-15 minutes to check for any signs of damage, discoloration, or undesirable texture changes.
- If everything looks good, proceed with confidence; if not, try a milder solution or consult a professional if you’re unsure.
This extra step ensures that your cleaning solution works well with the surface, giving you the best results without risking damage. By following these preliminary steps carefully, you set the foundation for a smooth, safe, and successful stain removal process. Remember, the preparation phase can often make the actual cleaning much easier, so don’t skip over it your surfaces and materials will thank you.

Simple DIY Methods To Remove Fresh Oil Stains
Accidentally spilling oil can be frustrating, but with a few simple ingredients commonly found around the house, removing fresh oil stains is surprisingly manageable. Here, we’ll explore two effective and budget-friendly methods for tackling fresh oil stains that don’t require specialized cleaners.
Method 1: Baking Soda and Dish Soap
This method is ideal for most households because baking soda and dish soap are readily available and effective at cutting through grease. Follow this step-by-step guide to lift fresh oil stains with minimal effort and cost.
- Sprinkle Baking Soda Over the Stain: Start by sprinkling a generous amount of baking soda directly onto the fresh oil stain. Baking soda is an excellent absorbent and will immediately begin soaking up excess oil from the surface, making it easier to scrub away later.
- Scrub with Dish Soap: Next, pour a few drops of dish soap onto the baking soda-covered area. Using a scrub brush or sponge, work the dish soap and baking soda into the stain. Dish soap is formulated to cut through grease, making it a powerful partner in this stain-fighting duo. Be sure to scrub thoroughly to break down the oil.
- Rinse and Check: Once you’ve scrubbed the area well, rinse it with warm water. Baking soda and dish soap not only tackle oil effectively but also leave little residue, making it easy to rinse off. Inspect the area to see if the stain is gone; if not, you can repeat the process for stubborn spots.
Using baking soda and dish soap is not only practical but also eco-friendly. These ingredients are non-toxic, safe on most surfaces, and usually already in your kitchen, which means you can address spills immediately without a trip to the store.
Method 2: Absorbent Materials (Kitty Litter or Sawdust)
If you’re dealing with a larger spill or have kitty litter or sawdust on hand, this method can save time and hassle. Both materials are highly absorbent and work best when applied as soon as the spill occurs.
- Apply a Generous Layer of Kitty Litter or Sawdust: Cover the fresh oil stain with a thick layer of kitty litter or sawdust, ensuring it completely blankets the area. These materials act as absorbents, drawing out the oil from the surface, which is especially useful for bigger stains on driveways, garage floors, or patios.
- Let it Sit (1-2 Hours): Allow the kitty litter or sawdust to sit on the stain for at least 1-2 hours. This gives the material time to soak up as much oil as possible. If the stain is particularly large or heavy, consider leaving it overnight for better results.
- Sweep Up and Dispose Properly: After letting the absorbent material work its magic, sweep it up with a broom and dispose of it properly. You may want to check local waste disposal guidelines since some areas have specific instructions for oil-soaked materials.
Using kitty litter or sawdust is incredibly efficient for quickly absorbing oil spills. These materials are relatively inexpensive, easy to find, and particularly useful in outdoor areas where liquid cleaners might be impractical.
Wrapping Up
Removing fresh oil stains doesn’t have to be a complicated or expensive ordeal. By using common household items like baking soda, dish soap, kitty litter, or sawdust, you can effectively tackle oil stains at home without investing in pricey commercial cleaners. Acting quickly is key: the sooner you address the stain, the better the results. Whether you’re in the kitchen or the garage, these methods can help you maintain a clean, stain-free space with ease and convenience.

Removing Older Or Stubborn Oil Stains On Concrete Surfaces
Concrete surfaces are incredibly durable, but they can be tough to clean when oil stains settle in. These stains, often deeply embedded in driveways, garage floors, or patios, require specialized approaches for effective removal. Below, we cover three tried-and-true methods, including commercial concrete cleaners, degreasers, and pressure washing, all readily available for homeowners in New Zealand.
Using Commercial Concrete Cleaner Products
For older or stubborn oil stains on concrete, commercial concrete cleaners can be highly effective. Popular brands available in New Zealand, like Wet & Forget and Bio-D Oil Remover, are formulated specifically for this purpose. These products use powerful, targeted ingredients to break down and lift oil from porous surfaces, making the cleaning process more manageable and often achieving better results than homemade solutions.
Step-by-Step Application
- Preparation: Start by clearing the area of any debris or loose dirt. If possible, sweep or rinse the surface lightly with water before applying the cleaner. This preps the area so the cleaner can penetrate the stain directly.
- Application: Follow the specific instructions on your chosen product. In most cases, apply the cleaner generously over the stain, ensuring complete coverage.
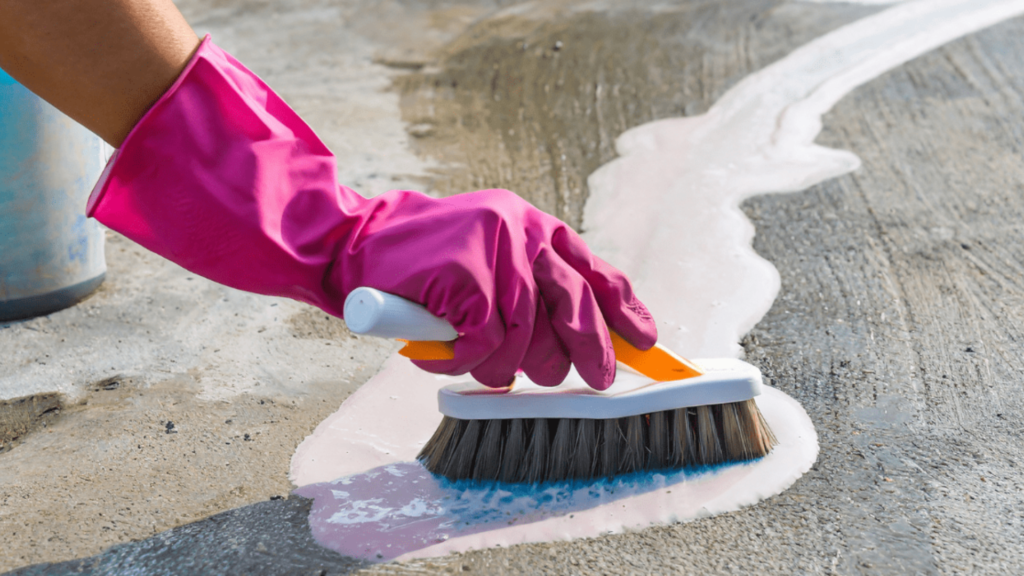
- Scrubbing: Use a stiff-bristled brush to work the cleaner into the stain. Scrubbing helps the active ingredients penetrate deep into the concrete, loosening the embedded oil particles.
- Let It Sit: Allow the cleaner to sit for the recommended time (often between 10–30 minutes) to let it break down the stain effectively.
- Rinse: Finally, rinse the area thoroughly with water. Some products may require a high-pressure rinse to fully remove residue. Always check the manufacturer’s guidelines for optimal results.
For particularly stubborn stains, repeat the process or try combining this method with a degreaser.
Using a Degreaser or TSP (Trisodium Phosphate)
Degreasers and TSP (Trisodium Phosphate) are excellent for tackling oil stains on concrete due to their strong grease-cutting properties. TSP, in particular, is known for its effectiveness in breaking down oils, but it must be used with care due to its potency and environmental impact.
Steps for Application
- Prepare Your Solution: For TSP, mix approximately one tablespoon of TSP with four liters of warm water. Degreasers will vary, so check the product’s instructions for proper dilution.
- Application: Wearing gloves, apply the solution to the stained area. Use a stiff-bristled brush or broom to work it into the concrete, ensuring thorough coverage over the entire stain.
- Scrub and Sit: Scrub the solution into the stain with even pressure, then let it sit for at least 10–15 minutes to allow it to break down the oil particles.
- Rinse: Rinse thoroughly with clean water, using a hose or a high-pressure nozzle to ensure all solution and residue are removed.
Environmental and Safety Precautions
- Avoid Drains and Waterways: When using TSP or any degreaser, avoid letting it reach storm drains, as these chemicals can be harmful to aquatic life.
- Proper Disposal: Dispose of any excess solution per local guidelines or dilute it heavily with water before disposal to lessen environmental impact.
Using TSP and other powerful degreasers can be an excellent option, but always ensure you’re working safely and disposing of chemicals responsibly.
Pressure Washing for Deep Stain Removal
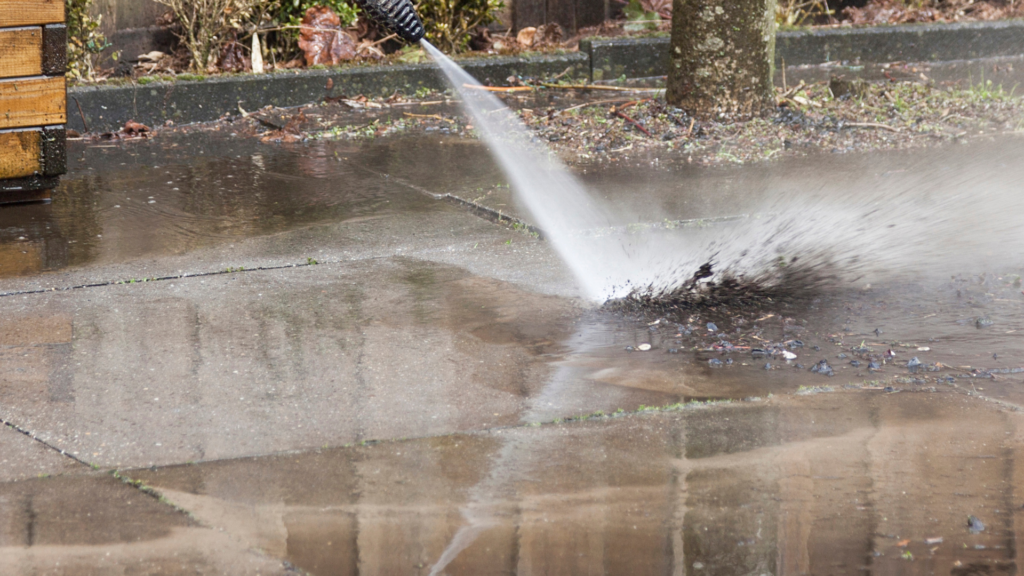
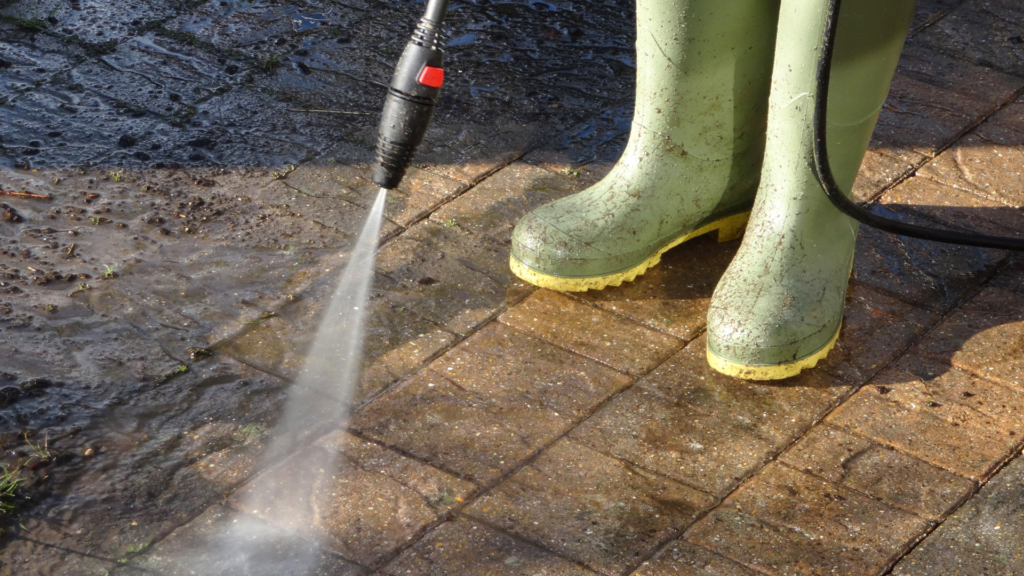
For stains that remain after chemical treatments, pressure washing is one of the most effective ways to clean oil-stained concrete. Pressure washing can reach deep into concrete pores, where oil often lingers, making it an ideal solution for older stains.
Pressure Washing Steps
- Choose the Right Equipment: For homeowners in New Zealand, many local hardware stores, such as Mitre 10 and Bunnings, offer pressure washer rentals if you don’t own one. Look for a machine with a PSI rating between 2500–3000 for concrete cleaning.
- Application: Start by setting the pressure to a mid-level setting and adjust as needed to avoid damaging the concrete. Always hold the wand at an angle to prevent gouging the surface.
- Safety Tips:
- Wear goggles and gloves to protect yourself from debris.
- Ensure the area is clear of pets or children.
- Keep the pressure washer moving continuously to avoid uneven cleaning or etching the concrete.
- Additional Help: If the stain persists, consider hiring a professional pressure washing service. In New Zealand, several companies specialize in this, and they bring expertise to prevent damage while achieving thorough results.
Combining pressure washing with a concrete cleaner can improve outcomes for deeply set stains. Restoring concrete to its original, oil-free condition may require multiple approaches, depending on how deep the stain has penetrated. Using readily available products like Wet & Forget, handling degreasers carefully, and using the power of a pressure washer are all effective options. By following these step-by-step methods, homeowners can tackle even the most stubborn oil stains and ensure that their concrete surfaces stay in top condition.

Eco-Friendly Options For Oil Stain Removal
When dealing with oil stains, choosing eco-friendly solutions not only helps maintain a cleaner environment but also provides a safer approach, especially if you’re working near plants, pets, or kids. Here, we’ll dive into two effective and natural methods to tackle oil stains without the use of harsh chemicals: the tried-and-true combination of baking soda and vinegar and some top bio-based cleaners available in New Zealand.
Using Baking Soda and Vinegar for Oil Stains
One of the most accessible and eco-conscious ways to treat oil stains involves using a simple paste made from baking soda and vinegar. Both ingredients are biodegradable, and when combined, they create a mild but effective cleaning solution that lifts oil without leaving harmful residues. Here’s a step-by-step guide.
Step-by-Step Guide for Using Baking Soda and Vinegar
- Prepare the Area: Start by clearing away any loose dirt or debris from the stained area. This makes it easier for the baking soda and vinegar to work directly on the oil stain without interference from other particles.
- Sprinkle Baking Soda: Generously sprinkle baking soda over the oil stain. Baking soda is a natural absorbent, so it’s perfect for soaking up the initial layer of oil. Let it sit for a few minutes to allow absorption.
- Add Vinegar: Slowly pour a small amount of white vinegar over the baking soda. The combination will create a fizzy reaction, which helps break down the oil molecules. This reaction can lift the oil out of surfaces like concrete or stone without causing damage.
- Scrub the Area: After the fizzing subsides, take a brush with firm bristles and scrub the area in circular motions. This helps lift any remaining oil that the baking soda and vinegar paste has loosened. You may need to add a bit of extra baking soda for tougher stains during this step.
- Rinse and Repeat if Needed: Rinse the area with warm water to clear away the solution and check the stain’s progress. For tougher or older stains, you may need to repeat the process a few times. Baking soda and vinegar are gentle enough that they won’t wear down most surfaces with repeated applications, making this method safe for stubborn spots.
Why Baking Soda and Vinegar Work Well
Baking soda and vinegar are both non-toxic, biodegradable, and budget-friendly. Baking soda’s alkalinity works to absorb oils effectively, while vinegar’s acidity helps cut through grime. However, if the stain is particularly stubborn, patience and repeated applications are key. Unlike chemical cleaners, baking soda and vinegar won’t give instant results for deeply ingrained stains but are more sustainable and safer for use around people, pets, and plants.
Bio-Based Cleaners Available in New Zealand
For those who prefer ready-made solutions, New Zealand offers several eco-friendly, bio-based cleaners perfect for oil stain removal. These cleaners use plant-based ingredients and biodegradable compounds to lift stains without leaving harsh residues. Here are two popular choices.
- Simple Green: Known for its non-toxic formula, Simple Green is a versatile cleaner that tackles various stains, including oil. It’s biodegradable, so you can feel confident using it around garden beds, plants, and water sources without risking harm to your garden ecosystem.
- Eco Works: This is another bio-based cleaner widely available in New Zealand that specializes in handling oil stains and other tough grime. Eco Works uses plant-derived ingredients that are tough on stains yet safe for the environment. It’s also effective on surfaces like patios, driveways, and garage floors where oil stains tend to appear.
Benefits of Bio-Based Cleaners
Choosing bio-based cleaners like Simple Green and Eco Works means you’re using products that break down into natural elements without releasing toxins. These cleaners are free from harsh solvents, making them safe for use around plants, animals, and children. They’re ideal if you’re cleaning oil stains near a garden or lawn, where runoff could affect the surrounding soil. Plus, bio-based cleaners tend to be milder on surfaces, preventing damage that harsher chemical cleaners might cause over time.
Using baking soda and vinegar or bio-based cleaners provides effective ways to remove oil stains without harming the environment. While chemical-based cleaners may offer faster results, they often come with trade-offs in terms of safety and environmental impact. By opting for eco-friendly choices, you not only help protect your outdoor spaces but also contribute to a healthier planet. Whether you’re spot-treating with baking soda and vinegar or using plant-based cleaners from New Zealand, these methods are perfect for a greener approach to stain removal.
Essential Preventative Tips For Keeping Your Concrete Stain-Free
Concrete surfaces like driveways, garage floors, and patios can add significant value and curb appeal to a home. However, they’re highly susceptible to stains from oil, dirt, and daily wear. Keeping these areas clean and stain-free doesn’t have to be difficult if you follow some simple preventative tips. Let’s dive into practical methods to help preserve the look and longevity of your concrete.
Sealing Your Concrete
Sealing is one of the best ways to prevent concrete stains. A good-quality sealant creates a protective barrier on your concrete, reducing its porous nature, which means it absorbs less oil, dirt, and other potential staining agents. This barrier helps protect against common stains from vehicles, outdoor furniture, and foot traffic.
When it comes to choosing the right sealant, look for options specially formulated for concrete surfaces. You’ll find a variety of concrete sealants available in New Zealand that can be applied with a brush or roller. Some of the top choices include acrylic sealers for outdoor use, penetrating sealers that guard against moisture, and epoxy-based sealants that offer a tough layer ideal for garage floors and high-traffic areas.
A general recommendation is to reseal your concrete every 2-3 years, depending on the level of use. For high-traffic areas or driveways exposed to frequent vehicle use, an annual resealing can further ensure protection. Regular resealing not only keeps stains at bay but also enhances the appearance of the concrete, giving it a fresh look year-round.
Routine Cleaning Practices
Routine cleaning is the easiest way to keep concrete looking like new and prevent tough stains from setting in. Here are a few tried-and-true tips to consider.
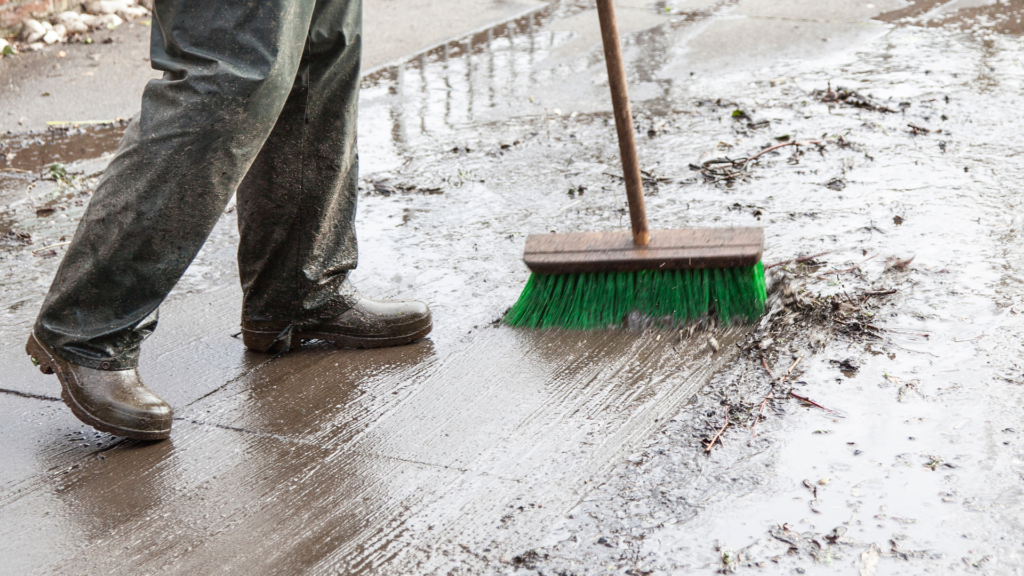
- Sweep Regularly: Dust, leaves, and other debris can accumulate quickly, especially on driveways. Make it a habit to sweep these areas weekly to avoid grime buildup.
- Periodic Washing: Use a garden hose or a pressure washer to wash down the concrete every couple of months. Warm water and mild detergent can lift everyday dirt and minor stains effectively. If you notice any small stains, address them promptly with a stiff brush and detergent.
- Absorbent Materials Under Vehicles: Place absorbent materials like cardboard or oil-absorbent pads under your car, especially if it’s prone to oil leaks. This is a quick and inexpensive way to prevent oil from ever reaching your concrete.
Routine cleaning not only keeps your space looking tidy but also helps you catch any developing stains early, making them easier to clean before they penetrate the surface.
Using Mats or Drip Trays
For areas where oil and fluids are a common risk, like in garages or under machinery, mats or drip trays can be an invaluable addition. By placing drip trays or heavy-duty rubber mats under vehicles, motorcycles, or garden equipment, you can stop spills from ever touching your concrete. This tactic is especially useful in garages, where oil leaks from cars or small spills from maintenance tasks can easily leave lasting marks.
- Garage Mats: Available in various sizes, these mats are specially designed to absorb fluids and prevent them from seeping into the ground. They’re easy to clean and durable enough to withstand vehicle traffic.
- Drip Trays: Drip trays come in different materials, from plastic to metal, and are an excellent option if you only need spot protection. For example, you could place a tray directly under your car’s engine or under heavy-duty equipment like lawnmowers.
Taking simple steps like these can save you significant cleaning time and prevent your concrete from becoming permanently stained. Plus, it adds a layer of safety by reducing the risk of slipping on oily patches.
Keeping Concrete Stain-Free: A Long-Term Investment
By investing a bit of time and effort into sealing, routine cleaning, and using mats or drip trays, you’ll extend the life and appearance of your concrete surfaces. Not only does this maintain your property’s value, but it also keeps your outdoor and indoor spaces looking well-kept and welcoming. With these preventative measures in place, you’ll find that keeping concrete stain-free is more manageable than you might think.
When To Call A Professional
In many cases, concrete surfaces can be cleaned effectively with a bit of effort and the right DIY approach. However, there are situations when tackling it yourself just won’t cut it, and calling a professional is the best route to ensure lasting results. Here’s what you need to know about identifying severe cases, finding a reliable concrete cleaning service in New Zealand, and understanding the costs involved so you can make the right choice.
Identifying Severe Cases for Professional Intervention
While some minor stains and grime can be handled with DIY methods, not all situations are suitable for a home fix. Here are some scenarios where it’s wise to turn to a professional.
- Large, Extensive Stains: If you’re dealing with stains that cover a large area or multiple spots on a concrete surface, like driveways, patios, or garages, it’s a sign that professional help is needed. These extensive stains can be hard to treat uniformly, and DIY methods may only spread the stain or make it worse.
- Older, Set-in Stains: Stains that have been on the concrete for years, such as oil spills, rust, or chemical stains, are notorious for being tough to remove. Even with specialized cleaners, these stains may only fade slightly with DIY methods. Professionals have industrial-grade cleaners and tools designed to tackle stubborn stains and get your concrete looking its best.
- Specialized Concrete Finishes: Certain concrete surfaces, such as stamped or colored concrete, require extra care to avoid damage. DIY treatments might cause discoloration or strip away protective layers on these unique finishes. Professionals understand the nuances of different finishes and can apply the appropriate treatment that protects and restores the surface.
Tips for Finding Reliable Concrete Cleaning Services in NZ
Choosing the right professional for the job is crucial to ensure your concrete gets the care it deserves. Here are some practical steps to help you find a reputable concrete cleaning service in New Zealand.
- Check Reviews and Testimonials: Online reviews can give you an honest look into the quality of a cleaning company’s work. Look for reviews on popular platforms like Google or Facebook and see if past clients are satisfied with the service provided. Pay attention to mentions of specific issues, such as reliability, punctuality, and quality of work, to gauge if they meet your standards.
- Ask for Recommendations: If friends, family, or neighbors have used concrete cleaning services recently, their recommendations can be invaluable. They can provide you with first-hand insights on the company’s professionalism, customer service, and pricing. Local knowledge can be a great asset when selecting a reliable contractor.
- Get Multiple Quotes: Don’t settle for the first estimate. Request quotes from at least three reputable companies to get a sense of the going rate for concrete cleaning services in your area. This approach also helps you identify potential red flags, such as a quote that’s significantly lower than others, which could mean lower quality work or hidden fees.
- Verify Insurance and Certifications: Working with a certified and insured professional means you’re protected if something goes wrong during the cleaning process. Reputable companies in New Zealand should have liability insurance and proper certifications for the chemicals or equipment they use.
Expected Costs and When It’s Worth the Investment
The cost of professional concrete cleaning can vary depending on factors such as the size of the area, the type of stains, and the complexity of the job. On average, prices in New Zealand might range between NZD $100 and NZD $500 for most residential surfaces, while larger areas or commercial properties can cost more. Here’s when it’s worth the investment.
- Severe or Multiple Stains: If your concrete is covered with severe stains or has multiple problem areas, a professional cleaning may be the only way to achieve a clean, uniform appearance.
- Preparation for Sealing or Resurfacing: If you’re planning to seal, resurface, or coat your concrete, a professional cleaning can ensure the surface is in optimal condition, helping new treatments adhere better and last longer.
- Saving Time and Effort: DIY cleaning, especially for large concrete surfaces, can be labor-intensive and may not yield the best results. A professional service saves you time and offers a thorough, reliable clean.
While DIY methods can handle minor stains, professional cleaning is essential for tough, extensive, or long-standing issues. By following these steps to find a reputable local service, you can protect your concrete, enjoy long-lasting cleanliness, and make a smart investment in the longevity of your surfaces.
FAQs: About How To Remove Oil Stains From Concrete NZ
Can I remove oil stains from concrete without using chemicals?
Yes, you can! Some effective, chemical-free methods include using baking soda, vinegar, or absorbent materials like kitty litter or sawdust. These options are eco-friendly and readily available. They work best on fresh stains, so it’s ideal to apply them as soon as the oil spill happens.
What is the best method to remove an old, stubborn oil stain from concrete?
For older or deep stains, a commercial concrete cleaner or a degreaser such as trisodium phosphate (TSP) tends to work best. You can also try pressure washing, as the high-pressure water can help lift stains embedded in the concrete. Always follow safety instructions when using these methods to avoid damaging the surface.
Can vinegar and baking soda remove oil from concrete?
Yes, vinegar and baking soda can be used to lift oil stains from concrete, especially for minor or recent spills. Sprinkle baking soda over the stain, apply vinegar, let it fizz, then scrub the area thoroughly with a stiff brush. This method may require a few applications for stubborn stains.
Is pressure washing safe for concrete?
Pressure washing can be effective for removing oil stains, but it’s essential to use the correct pressure setting to avoid damaging the concrete surface. In general, a setting of around 3,000 PSI is safe for most concrete surfaces, but it’s best to test in a small area first. If you’re unsure, consider hiring a professional to avoid potential surface damage.
How long should I let a concrete cleaner sit on the stain?
The duration can vary depending on the product. For most commercial concrete cleaners, 10–15 minutes is standard, but always read the product instructions for specific guidelines. Longer sitting times may improve results but could also increase the risk of discoloration on some surfaces.
Are there eco-friendly options to remove oil from concrete?
Yes! Several eco-friendly cleaners, such as Simple Green or Eco Works, are safe for the environment and effective on concrete stains. These products use biodegradable formulas that are less harmful to plants and animals, making them ideal for outdoor areas or homes with pets.
What products are available in NZ specifically for oil stain removal on concrete?
Popular options in New Zealand include Wet & Forget, Bio-D Oil Remover, and Simple Green. Many hardware stores and home improvement retailers stock these brands. Additionally, some online retailers may offer NZ-specific shipping for products not available in local stores.
How do I prevent oil stains on concrete in the future?
Preventative measures include using a concrete sealer, which forms a protective barrier that reduces oil absorption. You can also place mats or drip trays under vehicles, mowers, or any machinery likely to leak oil. Regular cleaning can also help prevent buildup, making stains easier to manage over time.
When should I call a professional to remove oil stains from concrete?
It’s best to call a professional if you have extensive, deep, or very old stains that DIY methods haven’t improved. Professionals can access industrial-grade cleaners and equipment like high-powered pressure washers or specialized solvents, which may be more effective on tough stains.
Does removing oil stains damage the concrete surface?
Most stain removal methods, when used correctly, won’t damage concrete. However, harsh chemicals, excessive scrubbing, or high-pressure washing can cause surface erosion, pitting, or discoloration. Always test cleaning solutions in a small area and follow safety guidelines to minimize potential damage.
Conclusion
Achieving a clean and appealing concrete surface is simpler than many might think, thanks to various effective DIY methods. By following these tips whether through straightforward cleaning solutions, a bit of elbow grease, or affordable household items anyone can restore their concrete surfaces to a like-new condition without needing extensive tools or costly services. Regular maintenance, as emphasized, is key in preventing future stains, keeping your concrete surfaces looking fresh and durable over time. We encourage you to try these easy-to-follow methods and enjoy the transformation of your driveway, patio, or sidewalk. After all, a well-maintained concrete surface not only adds to your home’s curb appeal but also contributes to a safer and cleaner environment. If you’ve discovered your own unique tricks or have insights into concrete cleaning, feel free to share them in the comments; we’d love to hear from you! For more practical tips and inspiration, explore our other home improvement articles and join our community of DIY enthusiasts dedicated to creating more beautiful and functional living spaces.
About the Author:
Mike Veail is a recognized digital marketing expert with over 6 years of experience in helping tradespeople and small businesses thrive online. A former quantity surveyor, Mike combines deep industry knowledge with hands-on expertise in SEO and Google Ads. His marketing strategies are tailored to the specific needs of the trades sector, helping businesses increase visibility and generate more leads through proven, ethical methods.
Mike has successfully partnered with numerous companies, establishing a track record of delivering measurable results. His work has been featured across various platforms that showcase his expertise in lead generation and online marketing for the trades sector.
Learn more about Mike's experience and services at https://theleadguy.online or follow him on social media:

