Welcome to your ultimate guide on how to lay paving slabs on grass, the perfect way to transform your outdoor space into a beautiful, functional area. Whether you’re looking to create a garden pathway, a cozy patio, or simply add structure to your lawn, this step-by-step guide will walk you through the entire process, from planning and preparation to laying the slabs and ensuring they stay in place for years to come. With the right tools, materials, and a bit of patience, you’ll soon have a stunning outdoor feature that not only enhances your garden but also boosts the overall aesthetic of your home.
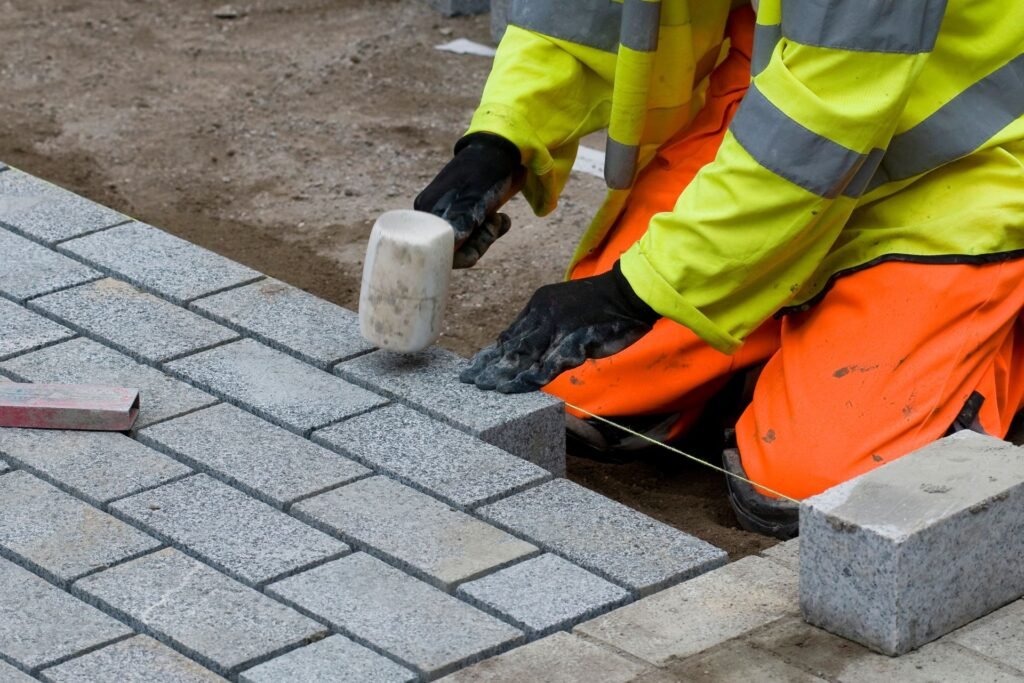
To lay paving slabs on grass, start by marking the area and removing the top layer of grass and soil. Next, create a level base using a mix of sharp sand and cement. Lay the slabs carefully, tapping them into place with a rubber mallet, ensuring they are evenly spaced and level. Finally, fill the gaps between the slabs with sand or mortar, and sweep away any excess for a clean finish.
Table of Contents
Why Choose Paving Slabs For Your Garden?
Paving slabs offer an excellent solution for anyone looking to enhance their garden without breaking the bank. Their versatility, aesthetic appeal, and durability make them a popular choice for outdoor spaces. Whether you’re looking to create a pathway, a patio, or a cozy seating area, paving slabs provide an affordable and practical option that suits various design needs.
Versatile and Affordable
One of the main reasons homeowners choose paving slabs is their versatility. They come in a wide range of sizes, shapes, colors, and textures, allowing you to create custom patterns that match your garden’s style. Whether you prefer a sleek, modern look or a more rustic, traditional design, paving slabs can be easily tailored to your vision. Additionally, they’re a budget-friendly choice compared to other outdoor flooring materials, such as natural stone or decking. This makes them a perfect solution for transforming your garden into an attractive, functional space without overspending. Plus, because paving slabs are easy to install, they’re a popular choice for DIY projects, saving you even more on labor costs.
Natural Look
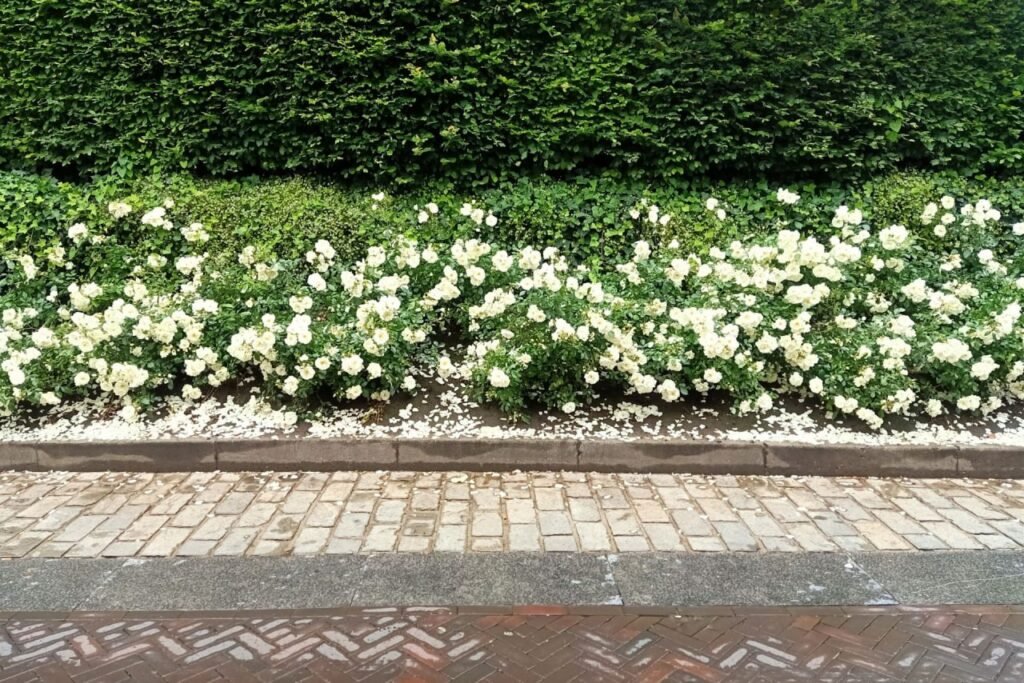
Paving slabs have a distinct advantage in terms of aesthetics—they can seamlessly blend with natural surroundings. Unlike some materials that may stand out awkwardly, slabs come in various earthy tones that harmonize with grass, trees, and shrubs. This gives your garden a more cohesive and inviting appearance. The slabs’ textured surfaces mimic the look of natural stone, providing a refined yet organic finish that complements both formal and informal garden designs. When laid in creative patterns or combined with other natural materials like pebbles or gravel, paving slabs can significantly enhance the overall ambiance of your outdoor space.
Durability and Practicality
Paving slabs are incredibly durable, making them a practical choice for high-traffic areas such as garden pathways or patios. Their hard surface can withstand heavy use, weather changes, and even the occasional knock or bump from garden tools or furniture. Once installed, they require very little maintenance, aside from occasional cleaning, making them a low-effort option for busy homeowners. You won’t have to worry about frequent repairs or replacements, as slabs are designed to last for many years. Furthermore, their non-slip surface ensures safety, even when wet, making them an excellent choice for families with children or pets. Whether for walking, dining, or lounging, paving slabs provide a reliable and sturdy surface that enhances both the look and functionality of your garden.
Paving slabs offer a cost-effective, visually appealing, and durable solution for any garden. Their versatility allows for endless design possibilities, while their natural look blends beautifully with outdoor spaces. As a practical option for homeowners seeking a low-maintenance yet stylish addition to their garden, paving slabs remain a top choice.
Planning Your Paving Slab Project
Planning a paving slab project is essential to ensure that everything from the layout to the materials is right for your garden or outdoor space. In this section, we’ll guide you through the critical aspects of planning, from defining the area and choosing the right slabs to assessing the ground conditions for successful installation.
Define the Area and Purpose
The first step in any paving slab project is determining the purpose and location of the installation. Will your paving slabs form a pathway, a patio, or perhaps a seating area in your garden? By clearly defining the purpose, you’ll make better decisions about the size, shape, and type of paving slabs that will work best for the space. Once you’ve defined the area, mark it out with string or stakes to get a real sense of the boundaries. This will help with visualizing the final layout and ensures the paving slabs fit into the overall garden design. It’s also important to consider accessibility and usability – for instance, will the area need to accommodate furniture, heavy foot traffic, or vehicles?
Choosing the Right Paving Slabs
Paving slabs come in a wide variety of materials, each with its own pros and cons. Concrete paving slabs, for example, are highly durable and affordable, making them a popular choice for many homeowners. They are available in a range of finishes and colors, allowing you to match them to almost any style. On the other hand, natural stone slabs such as limestone, slate, or sandstone offer a timeless, premium look with unique patterns and textures. However, natural stone can be more expensive and may require extra maintenance to retain its appearance. When choosing your paving slabs, consider the climate in your area and how different materials may weather over time. For instance, porous materials like sandstone may absorb water and crack in freezing conditions. Additionally, think about slip resistance, especially if your paving will be exposed to rain or water features.
Measuring the Area
Accurate measurements are key to avoiding material shortages or wastage. To start, measure the length and width of the area where you plan to install the slabs. Multiply these dimensions to get the square footage or meterage, depending on your preference. Once you have this figure, divide it by the size of the individual slabs you plan to use, which will give you a rough estimate of how many slabs you’ll need. It’s always a good idea to add about 10% to your order to account for breakages, cutting, and potential errors during installation. For more complex designs, like curved edges or intricate patterns, careful planning is essential to avoid costly mistakes.
Checking the Ground Conditions
Before laying your paving slabs, it’s vital to assess the ground conditions. Poor ground preparation can lead to uneven slabs, poor drainage, or even cracking over time. Start by checking the drainage – does the area tend to collect water after rainfall? If so, you’ll need to improve the drainage or choose a permeable paving material to allow water to filter through. Slope is another crucial factor, as a gentle slope can help direct water away from buildings or seating areas. Compactness is also critical; soft or loose soil may cause the slabs to shift over time. If the soil is too loose, it’s advisable to compact it or add a layer of gravel for better stability. By addressing these issues early on, you’ll ensure your paving slabs remain level and durable for years to come.
Planning your paving slab project thoroughly from the beginning will save you time and money in the long run, while ensuring that the final result is both functional and aesthetically pleasing.

Tools And Materials You Will Need
When preparing for a paving slab project, having the right tools and materials is essential for ensuring a smooth and successful process. This section breaks down the tools, materials, and safety gear you’ll need to achieve professional results while maintaining a safe working environment.
List of Tools
The tools you choose play a critical role in the precision and efficiency of your paving slab installation. Here’s a closer look at the key tools you’ll require:
- Shovel and Spade: These are necessary for digging and leveling the ground. The spade helps define the edges and the overall depth of the area you’re working on, while the shovel is useful for removing soil and debris.
- String Line: A string line ensures that your paving slabs are laid in straight, even rows. It serves as a visual guide to keep your layout consistent and aligned.
- Rubber Mallet: A rubber mallet allows you to tap the paving slabs into place without damaging them. It’s a safer alternative to a hammer, as it minimizes the risk of cracks or chips on the slabs.
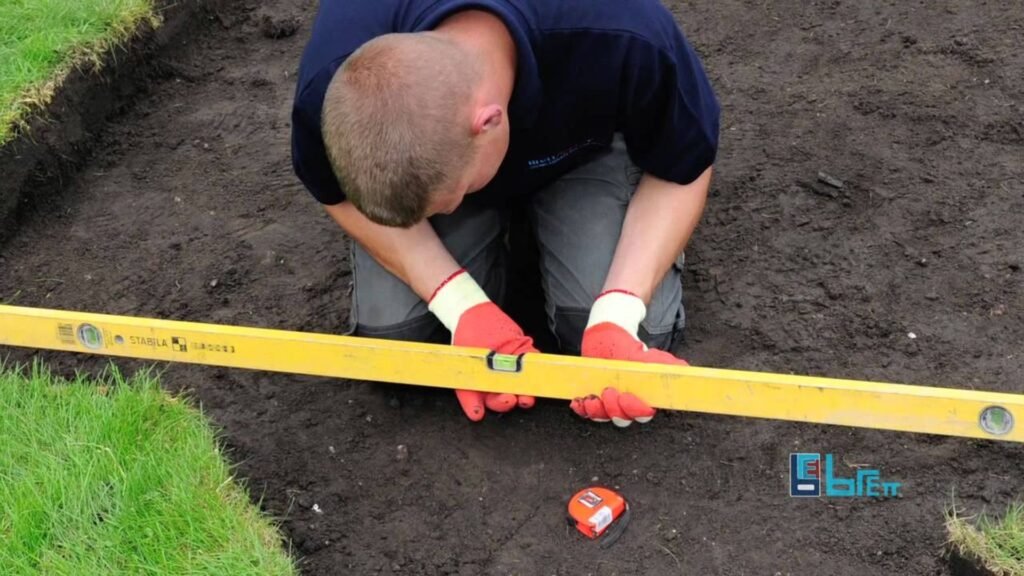
- Spirit Level: Achieving a level surface is crucial for a polished, professional finish. A spirit level ensures that your paving slabs are even and prevents future water pooling or uneven surfaces.
- Tape Measure: Accurate measurements are key to a successful project. A tape measure helps you plan your layout precisely and ensures that your paving slabs fit the desired area.
- Garden Rake: A garden rake is used for smoothing out the sand or gravel layer before laying the slabs. This helps create an even base for the slabs to rest on, improving stability and reducing the risk of shifting over time.
Materials
The materials you choose will determine the durability and longevity of your project. Here’s a breakdown of the essential materials you’ll need:
- Paving Slabs: These are the centerpiece of your project. Choose slabs that complement your garden’s style and are suitable for outdoor use. The quality of your slabs will directly affect the appearance and durability of your paved area.
- Sharp Sand: Sharp sand is used to create a firm base layer beneath your paving slabs. It provides support and helps prevent the slabs from shifting or sinking over time.
- Cement: Mixed with sand, cement acts as a bonding agent to secure the slabs in place. A mix of cement and sand also provides stability and durability for the entire installation.
- Weed Control Membrane: This is an essential step to prevent weeds from growing between the paving slabs. It’s laid down before the gravel or sand base, creating a barrier that blocks weed growth while allowing water to drain away.
- Fine Gravel or Crushed Stone: A layer of fine gravel or crushed stone serves as a foundation for your paving slabs, adding stability and aiding in proper drainage. It also helps to evenly distribute the weight of the slabs, preventing them from sinking into the soil.
Safety Gear
Safety should be a priority during any construction project, no matter the size. Here’s the protective gear you’ll need:
- Gloves: A sturdy pair of gloves will protect your hands from cuts, scrapes, and blisters while handling tools and materials.
- Knee Pads: Since laying paving slabs often involves kneeling on hard surfaces, knee pads will help prevent discomfort and protect your knees from strain or injury.
- Protective Eyewear: To shield your eyes from dust, debris, and cement particles, protective eyewear is essential. This simple precaution helps to avoid potential injuries while cutting or handling materials.
Optional Materials
If you want to add extra stability or refine the edges of your project, consider these optional materials:
- Edging Stones: Edging stones can help define the borders of your paved area, giving it a cleaner, more structured look. They also help keep the paving slabs in place and prevent movement over time.
- Garden Hose: Using a garden hose as a flexible guide can make marking out curved or irregularly shaped areas much easier. It’s a simple tool that can help you achieve precise lines without needing extra equipment.
- Additional Gravel: In some cases, adding a layer of gravel beneath the sand base can provide extra stability. This is particularly useful in areas with poor drainage or unstable soil, ensuring your paving slabs remain level and secure.
By ensuring you have all the necessary tools, materials, and safety gear, you’ll be well-prepared to tackle your paving slab project with confidence. Proper planning and preparation are the keys to a smooth installation process, helping you avoid common mistakes and ensuring your new paved area looks great and lasts for years to come.
Preparing The Ground For Paving Slabs
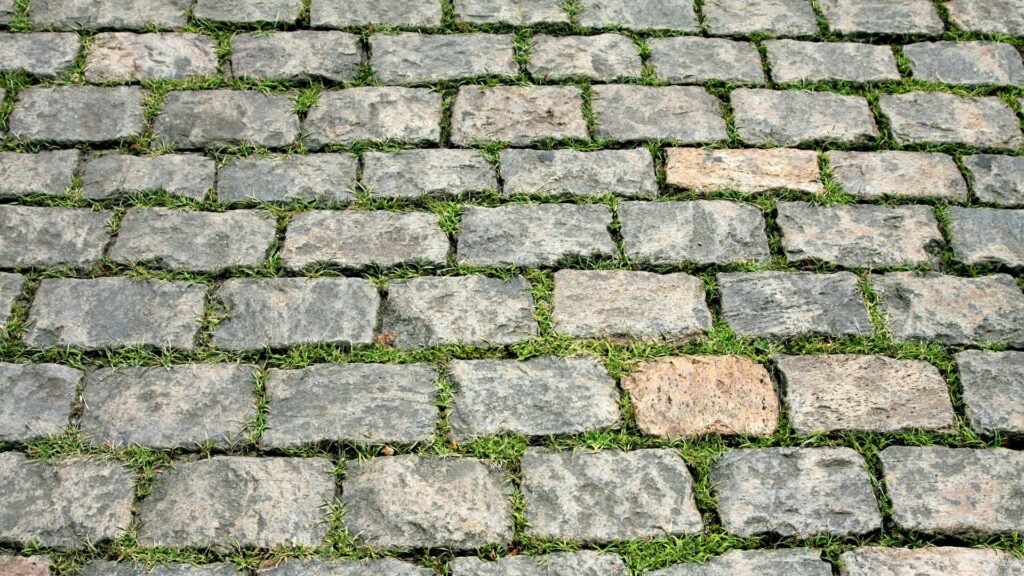
Properly preparing the ground is crucial for the longevity and stability of your paving slab project. Skipping or rushing this step can lead to uneven slabs, drainage issues, or shifting over time. Follow these detailed instructions to ensure a solid foundation.
Marking the Area
Before any digging begins, clearly marking the area where you intend to lay the paving slabs is essential. Start by using string and pegs to outline the boundaries of the space. This method helps you maintain straight lines, especially for rectangular or square designs. For curved paths or patios, a garden hose can be an excellent alternative for marking out smooth, flowing curves. Once the area is marked, step back to ensure everything aligns as you envisioned. Making adjustments at this stage is much easier than after the groundwork begins.
Remove Grass and Topsoil
To create a stable base for your paving slabs, it’s necessary to clear the area of any grass, plants, or topsoil. Begin by using a spade or a turf cutter to remove the grass in manageable sections. Ensure you dig deep enough, about 100-150mm (4-6 inches), to remove not only the grass but also the nutrient-rich topsoil beneath it. This is important because the topsoil is loose and unsuitable for supporting heavy paving slabs. Once the area is cleared, dispose of the grass and topsoil or repurpose them in another part of your garden.
Compact the Soil
After removing the grass and topsoil, the next step is to compact the exposed soil. Compacting helps to create a firm foundation, preventing any future movement or sinking of your paving slabs. You can use a garden tamper, which is a heavy, flat-bottomed tool, to manually compact the soil by pressing it down in a firm, even manner. Alternatively, a hand roller can be used to cover larger areas more efficiently. Compacting the soil might seem like an extra step, but it ensures your paving will remain level and durable in the long run.
Laying a Weed Membrane
To prevent weed growth between your slabs in the future, it’s crucial to lay a weed membrane before adding any sub-base material. This semi-permeable fabric allows water to drain away but blocks weeds from coming up through the cracks. Spread the weed membrane across the entire marked area, making sure to overlap the edges slightly to ensure full coverage. Secure it in place with landscape staples or heavy stones to keep it from shifting as you proceed with the rest of your project. By installing a weed membrane, you’ll reduce the time and effort required for maintenance later on.
Following these steps carefully will set the stage for a smooth, long-lasting paving slab project, giving you a stable, weed-free surface that will hold up against the elements for years to come.

Creating The Base For Paving Slabs
Layer of Sand and Cement
To create a strong foundation for your paving slabs, it’s essential to use a combination of sharp sand and cement. This blend offers stability and durability, ensuring your slabs remain even over time. A recommended mix for this base is four parts sharp sand to one part cement (4:1 ratio). Sharp sand provides the necessary grit, while cement adds binding strength to hold the base together.
To begin, mix the sand and cement until you achieve an even consistency. The best way to do this is to use a shovel or a mixing tool. You’ll want the mixture to be damp but not overly wet, so it sticks together when squeezed but doesn’t drip water. Once mixed, spread the layer of sand and cement evenly over the area you’ve prepared for your paving slabs. A depth of around 50-60mm is generally ideal, providing a sturdy foundation without being too thick. Spread the mix evenly using a shovel or rake, ensuring the entire surface is covered.
Leveling the Base
Getting the base level is crucial for preventing your slabs from shifting or cracking over time. Start by using a rake to smooth out the sand and cement mixture. Afterward, take a spirit level and place it across the surface to check for evenness. It’s helpful to work in sections, checking frequently to ensure there are no high or low spots. For larger areas, consider using a long, straight piece of timber or a screeding tool to draw across the surface while monitoring the level.
If you notice any uneven spots, adjust them by adding or removing small amounts of the mixture. Take your time with this step, as a well-leveled base will ensure that your paving slabs sit securely and evenly.
Compact the Base
Once the base is leveled, the next step is to compact it. This will create a firm and solid foundation that prevents the paving slabs from sinking or shifting over time. A tamper or plate compactor works best for this. If you’re working on a smaller project, a hand tamper will do the trick, but for larger areas, renting a plate compactor is more efficient.
Go over the entire surface with the tamper, ensuring consistent pressure across the base. The goal is to pack the sand and cement down tightly, eliminating any air pockets or loose areas. A well-compacted base should feel firm to walk on, with little to no movement underfoot. This final step will give you the confidence that your paving slabs will rest securely on a stable foundation, providing long-term durability for your outdoor space.
By carefully mixing, leveling, and compacting the base, you set the stage for a flawless paving slab installation that will last for years.
How To Lay The Paving Slabs
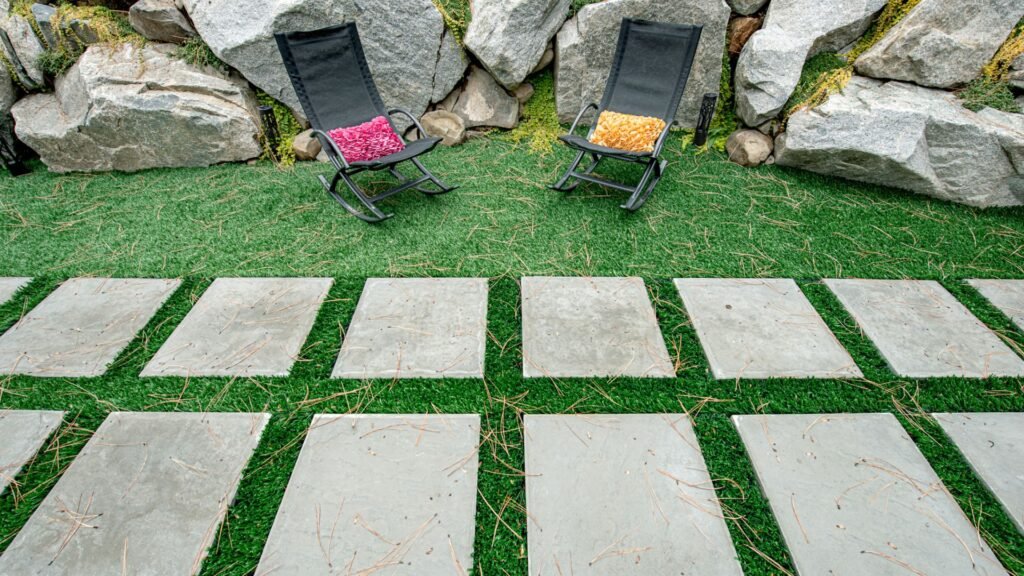
Laying paving slabs may seem like a straightforward task, but it requires careful attention to detail to ensure a professional and long-lasting finish. Whether you are creating a patio, walkway, or decorative garden feature, following the right steps will save you time and effort in the long run.
Starting Point: Ensuring the First Slab is Perfectly Level
The first slab you lay serves as the foundation for the entire project, so it’s crucial to get it right. Begin by selecting a corner or an edge of your project area as your starting point. This provides a clear reference for the remaining slabs. If possible, use a straight edge or string line to ensure that the starting point is aligned with your design.
Before placing the slab, ensure the surface beneath is level and compact. Spread a thin layer of sand or mortar mix to give the slab a stable base. Gently place the first slab onto the prepared surface, ensuring it’s positioned squarely. Once in place, use a spirit level to check that the slab is perfectly level. If necessary, add or remove small amounts of sand or mortar under the slab to achieve an even surface. This initial setup is critical, as it sets the tone for the rest of the project.
Positioning the Slabs: Gentle but Firm Placement
Once your first slab is set, begin positioning the others in a similar manner. Carefully lift each slab and place it into position, being mindful of the alignment with the adjacent slabs. For accuracy, avoid sliding the slabs into place, as this can disturb the sand or mortar beneath.
After positioning each slab, use a rubber mallet to gently tap it into place. The mallet provides enough force to settle the slab without causing any cracks or damage. Tap the slab evenly across the surface, focusing on the corners and center to ensure uniform contact with the base.
Spacing the Slabs: Tightly Together or Spaced Apart?
The spacing between slabs depends largely on the design you’ve chosen. If you want a clean, continuous surface, you can lay the slabs tightly together, minimizing the gaps. This creates a sleek and unified look, perfect for modern patios or walkways.
Alternatively, you may prefer to leave a small gap between each slab, especially if you plan to fill the joints with gravel, sand, or decorative plants. Spacing the slabs apart can add texture and interest to your design while allowing for better drainage. If you choose this method, use a spacer or consistently measure the gap between each slab to ensure a uniform pattern.
Checking for Level: Adjustments for a Smooth Surface
As you lay each slab, it’s essential to check the level frequently. Use a spirit level to ensure each slab is even with the surrounding slabs and doesn’t create an uneven surface. Small adjustments are often necessary, especially if the ground beneath is slightly uneven.
If a slab is too low, lift it carefully and add more sand or mortar underneath until it reaches the desired height. If it’s too high, remove some of the base material before repositioning the slab. Constantly checking for level will help you avoid an uneven surface, which can lead to tripping hazards or water pooling.
Taking the time to follow these steps will ensure your paving slabs are laid properly, creating a durable, aesthetically pleasing surface that will last for years.
Filling The Gaps Between Paving Slabs
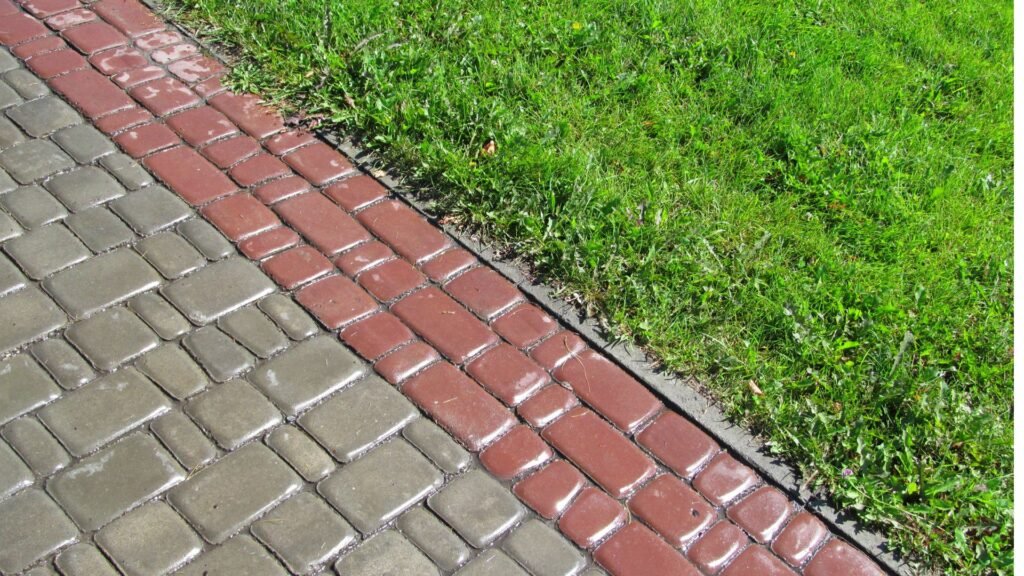
Filling the gaps between your paving slabs is a crucial step that not only helps maintain the integrity of the patio or walkway but also enhances its visual appeal. The method you choose can affect both the look and longevity of your outdoor space. Here’s a detailed look at the different options available, how to fill the joints properly, and why sealing them might be a good idea.
Different Options for Jointing
When it comes to filling the gaps between paving slabs, there are several materials you can choose from depending on the aesthetic you want to achieve and the durability you’re looking for:
1. Sand: This is the most common and affordable option, often used for standard patios and pathways. You’ll want to use kiln-dried sand, which has been specially treated to be fine and free of moisture. It’s easy to sweep into the joints and can be compacted for a firm hold. However, sand can be washed out over time, so it may require periodic reapplication.
2. Mortar: Mortar is a stronger option, typically used for heavier-duty surfaces, such as driveways or patios that bear more weight. It’s a mixture of sand and cement that hardens into a solid bond. Mortar is more permanent than sand but requires careful application to avoid spilling onto the slabs themselves. It also offers better weed prevention due to its solid nature.
3. Decorative Stones: For a more unique and visually appealing look, decorative stones or gravel can be placed in between the slabs. This is a great option for garden paths or areas where drainage is important. While decorative stones offer an attractive, rustic feel, they may shift over time and require occasional maintenance to keep the joints filled.
How to Fill the Joints
Once you’ve chosen your jointing material, filling the gaps between the paving slabs is fairly straightforward. Here’s how to do it step-by-step:
1. Prepare the Area: Before you begin, make sure your paving slabs are firmly in place and any excess debris is cleared from the joints. A quick sweep with a stiff brush should do the trick.
2. Spread the Jointing Material: For sand, pour a generous amount onto the surface of the slabs and use a broom to sweep it into the gaps. Work diagonally to ensure the sand fills the joints completely, rather than being pushed out. For mortar, you’ll need to mix it according to the manufacturer’s instructions, then use a trowel to apply it to the gaps. If using decorative stones, simply scatter them evenly between the slabs, then use your hands or a small brush to ensure they settle properly.
3. Compact the Filler: After filling the joints, it’s important to compact the material to prevent any shifting or settling later on. With sand, you can use a plate compactor or simply walk over the area to press the sand down. For mortar, press it into the joints with the flat side of a trowel. Decorative stones should also be compacted by pressing them down with your hands or a flat object.
4. Add More Material as Needed: Once compacted, you may notice some joints aren’t as full as they should be. Go back over these areas and add more filler material, repeating the compacting process.
Sealing the Joints (Optional)
Sealing the joints between your paving slabs can add an extra layer of durability and protection, particularly against weeds and water damage. While it’s an optional step, it’s one worth considering if you want your paving project to last longer with less maintenance.
- Why Seal? Sealing helps to lock the jointing material in place and creates a barrier against the elements. It also prevents weeds from growing in the gaps, which can be a common issue if using sand or decorative stones.
- How to Seal the Joints: After filling the gaps, wait until everything is completely dry. Then, apply a paving sealer according to the manufacturer’s instructions, making sure to focus on the joints. You can use a brush or roller to ensure even coverage. Keep in mind that sealing works best when the weather is dry, so plan accordingly.
Filling the gaps between your paving slabs can be a quick and simple task, provided you choose the right jointing material and apply it correctly. Whether you go for classic kiln-dried sand, strong mortar, or decorative stones, taking the time to fill and compact the joints properly will help ensure your outdoor space looks great and stays durable for years to come.

Finishing Touches
Once your paving slabs are laid and secured, the finishing touches are what will really elevate the look and feel of your project. Attention to detail at this stage not only enhances the appearance of your paved area but also helps to ensure its longevity and durability. Let’s go over the steps that can make all the difference in the final outcome.
Cleaning the Paving Slabs
After the paving slabs are in place, it’s common to have some excess cement, mortar, or sand scattered across the surface. To prevent this from hardening and potentially damaging the slabs, it’s essential to clean them properly. Start by using a soft brush to sweep away loose debris, sand, or dirt. Avoid using a hard-bristled brush, as it could scratch the surface of your paving slabs, especially if they are made of a softer material like limestone or sandstone.
Next, use water to gently rinse the area. If you notice stubborn cement stains, a mild cleaning solution can help dissolve the residue. Make sure to use products that are safe for the type of slabs you’ve installed—harsh chemicals could cause discoloration or damage. Avoid power washing immediately after installation, as it could disrupt the settling process of the slabs or jointing material. A little bit of elbow grease and patience will go a long way in giving your pathway or patio a fresh, clean finish.
Adding Edging
Edging is often overlooked, but it plays a critical role in the durability and aesthetic of your paving project. Not only does it help contain the paving slabs, preventing them from shifting over time, but it also provides a clean, polished border that elevates the overall look. Consider using edging stones, which are specifically designed for this purpose. These come in a variety of styles and materials, such as concrete, brick, or stone, allowing you to complement the design of your paving slabs.
Install edging stones by embedding them in mortar for a secure fit, ensuring they are level with the surface of your pathway or slightly raised for a defined border. Another option is to use flexible plastic or metal edging, which is particularly useful for curved paths. Edging doesn’t just add structural integrity—it also frames your paving area, giving it a professional, finished look.
Decorative Elements
Adding decorative elements is the final step to make your outdoor space truly unique. Consider enhancing the pathway or patio with decorative gravel along the edges. This not only adds texture and color contrast but also helps with drainage by allowing water to flow away from the paving. Choose gravel that complements the color and style of your slabs, whether you opt for natural tones or something more striking like white or black pebbles.
For a lush, garden-inspired feel, incorporate plants or flowers along the border. Perennial plants or low-growing shrubs can soften the hard lines of the paving and add vibrant color throughout the year. You might also consider using planter boxes or raised beds for a more structured, formal aesthetic.
Lighting is another fantastic way to elevate your paving project, particularly if it will be used in the evening. Solar-powered lights are an eco-friendly option and can be easily installed along the sides of the pathway or patio. LED strip lights embedded into the edging or recessed lighting in the slabs can create a sleek, modern look. Not only do these lights enhance the beauty of your paved area, but they also improve safety by illuminating the path at night.
Maintenance Tips For Your Paving Slab Path Or Patio
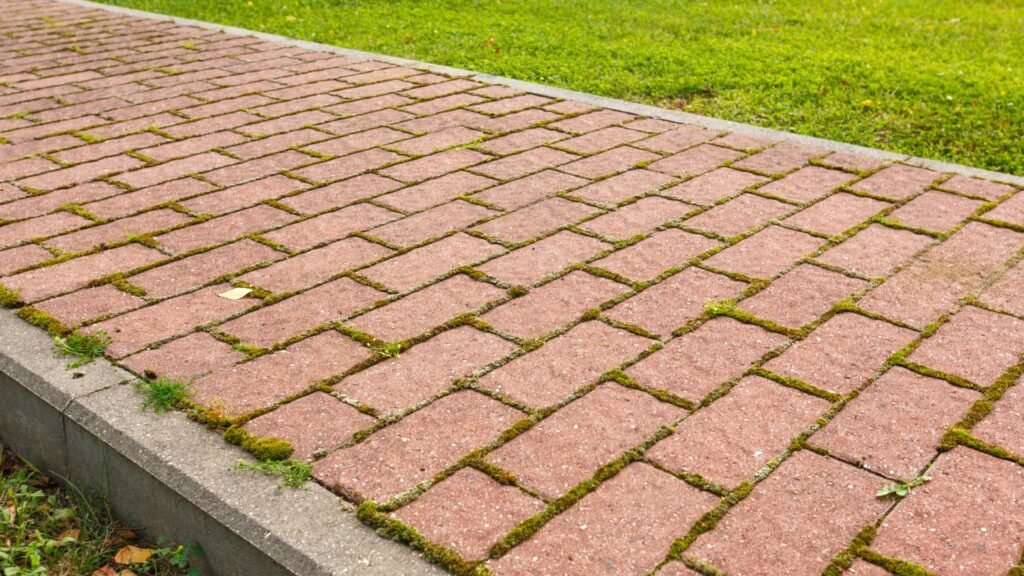
Proper maintenance of your paving slab path or patio is crucial to keeping it looking its best and ensuring it remains functional for years to come. While paving slabs are relatively low-maintenance compared to other materials, a regular upkeep routine can prevent issues like stains, moss growth, weed invasions, and shifting slabs. Here’s how to maintain your paving slab path or patio effectively.
Regular Cleaning
Regular cleaning is essential to prevent the buildup of dirt, debris, and organic material that can eventually lead to stains or moss growth. A simple sweep with a stiff broom every week or so can go a long way in maintaining the appearance of your patio or path. In areas where moss or algae tend to grow due to moisture, it’s recommended to wash the slabs occasionally with clean water and a mild detergent.
For a more thorough clean, consider using a garden hose with a pressure nozzle. However, avoid using high-pressure washers too often, as the force can dislodge the joints between the slabs or cause damage to the surface. If stains appear from organic material like leaves or spills, addressing them immediately can prevent permanent marking. For tougher stains, a specialized outdoor cleaner can be used, but always test a small area first to ensure it won’t discolor the slabs.
Weed Prevention
Weeds often find their way into the gaps between paving slabs, which can spoil the look of your patio or path and even lead to long-term damage. To prevent weeds, a good maintenance tip is to regularly check the joints between slabs and remove any sprouting weeds by hand before they can take root.
You can also apply a weed-preventive solution between the joints once or twice a year, particularly in the spring and autumn when weeds are most likely to grow. Consider using a jointing compound with added weed inhibitors when laying the slabs to minimize weed growth. Another effective method is to use polymeric sand in the joints, which hardens upon contact with water and helps to block weed growth.
Re-leveling Slabs
Over time, paving slabs may shift due to natural ground movement, creating an uneven surface that not only looks unsightly but can also become a tripping hazard. Re-leveling the slabs is a fairly simple process that can restore the smoothness and functionality of your path or patio.
To re-level a slab, first, identify the ones that have shifted or become uneven. Carefully lift the slab using a crowbar or similar tool, taking care not to damage it. Once removed, inspect the base. It may be necessary to add or remove some sand or gravel to correct the height. After adjusting the base, reposition the slab and ensure it is level with the surrounding slabs. You can use a spirit level for precision. Once the slab is in place, fill the joints with fresh jointing material and compact it to hold the slab securely.
Maintaining a path or patio with paving slabs doesn’t require too much effort, but regular attention can save you from more significant repairs down the line. Regular cleaning, effective weed control, and timely re-leveling will keep your paving slab installation looking great and functioning as it should for years to come.

Common Mistakes To Avoid
When it comes to laying paving slabs, attention to detail can mean the difference between a long-lasting, professional-looking patio or path and one that requires constant repairs. Many DIYers, eager to finish their projects, often overlook key steps. Let’s take a closer look at some of the most common mistakes and how to avoid them to ensure your paving slab project stands the test of time.
Inadequate Ground Preparation
One of the most crucial aspects of laying paving slabs is creating a solid foundation. Skimping on ground preparation can lead to major problems down the line. A poorly prepared base will cause your slabs to sink or shift over time, creating an uneven surface that’s both unsightly and potentially dangerous.
To avoid this, take the time to excavate the area properly, removing any soft or loose soil, and ensure the base is compacted thoroughly. A good rule of thumb is to dig to a depth of at least 150mm (6 inches) below the final surface level, especially if the area will bear weight. Adding a layer of hardcore or crushed stone (about 75-100mm) and compacting it before laying the slabs is essential for providing the stability needed to prevent shifting or sinking.
Skipping the Weed Membrane
Another common mistake that many overlook is the use of a weed membrane. Some may think it’s unnecessary, but skipping this step can lead to persistent and frustrating weed problems. Over time, weeds can grow between the cracks of your paving slabs, making your patio or path look unkempt and requiring more maintenance than you’d like.
Laying a weed membrane before adding the hardcore base is a simple but effective way to prevent weeds from breaking through. This membrane serves as a barrier, stopping unwanted plants from sprouting while still allowing water to drain freely through the surface. For a hassle-free finish, this is one step you don’t want to skip.
Rushing the Process
Patience is key when it comes to laying paving slabs. Rushing the job can result in a variety of issues, from uneven slabs to misalignment, both of which can compromise the overall durability and appearance of your project. Taking shortcuts, such as not allowing adequate time for mortar or cement to set properly, can also lead to slabs shifting out of place after installation.
Take your time to ensure each slab is level and placed correctly. Use a spirit level to check the alignment as you go, and make any adjustments before the mortar sets. If you’re working with mortar or cement, allow sufficient curing time before walking on the surface or applying any heavy loads. This not only ensures that the slabs stay in place but also contributes to a more professional-looking result that lasts for years.
By paying close attention to these details and avoiding these common mistakes, you’ll ensure your paving slab project is not only visually appealing but also built to last. It may take a little extra time and effort upfront, but the long-term benefits are well worth it.

FAQs: About How To Lay Paving Slabs On Grass
Can I lay paving slabs directly on grass?
No, it’s not recommended to lay paving slabs directly on grass. You need to prepare the ground by removing the grass and creating a firm, level base using sand or a mix of sand and cement. This prevents the slabs from shifting or sinking over time.
What tools do I need to lay paving slabs on grass?
The essential tools include a shovel, spade, string line, rubber mallet, spirit level, tape measure, and garden rake. You may also need a tamper for compacting the ground, as well as safety gear like gloves and knee pads.
Do I need to use a weed control membrane?
Yes, it’s a good idea to lay a weed control membrane underneath the base layer to prevent weeds from growing between the slabs. This will help keep your pathway or patio looking neat and low-maintenance.
What is the best material to use as a base for paving slabs?
A mix of sharp sand and cement (typically in a 4:1 ratio) is commonly used as the base for paving slabs. This combination provides a solid foundation that prevents slabs from shifting or sinking over time.
How deep should the base be for laying paving slabs?
The base should generally be about 50mm to 100mm deep, depending on the size and weight of the slabs. Make sure the area is compacted properly to create a stable foundation for the paving slabs.
How do I ensure the paving slabs are level?
Use a spirit level frequently as you lay each slab to ensure that the surface remains even. If a slab is too low, you can add more sand or adjust it until it’s level with the surrounding slabs.
Should there be gaps between the paving slabs?
It depends on your design preference. You can lay slabs tightly together for a seamless look, or leave small gaps between them, which can be filled with sand, mortar, or decorative stones.
What can I use to fill the gaps between paving slabs?
The gaps can be filled with materials like sharp sand, mortar, or decorative gravel, depending on the look you want. Sand is the easiest to use, while mortar creates a more permanent solution.
How long does it take to lay paving slabs on grass?
The time it takes depends on the size of the area and your experience level. For a small pathway or patio, the project could take a weekend to complete, from preparation to finishing touches.
How do I maintain paving slabs laid on grass?
Regular maintenance includes sweeping the slabs to remove debris, cleaning them occasionally with water to prevent staining, and checking for any shifting or uneven slabs that may need adjusting. You can also apply a weed killer if necessary to control growth between the slabs.
Conclusion
Laying paving slabs on grass can be a rewarding DIY project that transforms your garden with just a bit of planning and effort. To recap the key steps, you begin by carefully mapping out your project and gathering the necessary tools and materials. Then, you move on to preparing the ground by removing any grass and leveling the area. Next, you create a solid base, ensuring that the slabs are laid evenly, with proper spacing, before filling the gaps with sand or gravel for a polished finish. Maintenance is simple, involving occasional cleaning and checking for any shifting slabs over time. With the right approach, this project is accessible to anyone willing to invest the time, and the results can truly elevate your outdoor space. If you’re ready to take on this project or have any questions, feel free to share your experience or ask in the comments. Don’t forget to check out our additional guides for more DIY garden inspiration!
About the Author:
Mike Veail is a recognized digital marketing expert with over 6 years of experience in helping tradespeople and small businesses thrive online. A former quantity surveyor, Mike combines deep industry knowledge with hands-on expertise in SEO and Google Ads. His marketing strategies are tailored to the specific needs of the trades sector, helping businesses increase visibility and generate more leads through proven, ethical methods.
Mike has successfully partnered with numerous companies, establishing a track record of delivering measurable results. His work has been featured across various platforms that showcase his expertise in lead generation and online marketing for the trades sector.
Learn more about Mike's experience and services at https://theleadguy.online or follow him on social media:


